Adding Flight to an Avatar
Here's how to add the ability to fly to your avatar.[1]
Warning: This entire feature relies on a physics bug, which may be fixed in the future.
Note: This guide was written in Unity 2018.4.20f1 on Windows 10. YMMV.
Prerequisites
- VRCSDK2
- A working avatar
- Some experience with Unity
Process
- With your Unity project open, right-click on your avatar's root node in the scene hierarchy.
- Select Create Empty from the context menu.
- Rename the new empty GameObject to Fly or something similar.
- Right-click Fly in the hierarchy.
- Select 3D Object > Cube.
- Select your new Cube in the hierarchy.
- In the Inspector, set the scale of Cube to:
- X: 2
- Y: 0.4
- Z: 5
- Set the rotation of the X axis to -30.
- Disable the Mesh Renderer.
- Make sure Box Collider is enabled. Leave it at default settings.
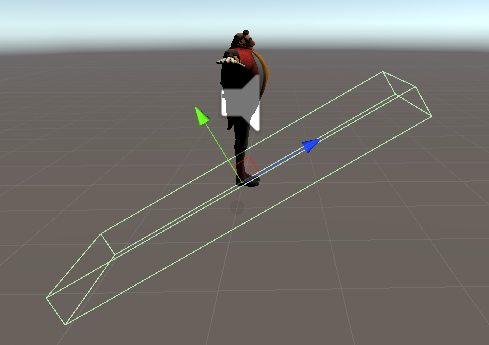
Your cube should now look like this:

However, you will want to toggle this ability with a gesture or emote, otherwise you will always be in "flight mode". You will want to toggle the Fly node we made earlier.
References
- ↑ Rampag3, How to Make a Flying Avatar https://www.youtube.com/watch?v=w28WejN9MMQ