Add outfit: Difference between revisions
No edit summary |
No edit summary |
||
| Line 113: | Line 113: | ||
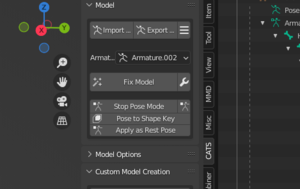
* Aim for shoulders and hips first | * Aim for shoulders and hips first | ||
* Apply as rest pose when done | * Apply as rest pose when done | ||
==Merging Armatures== | |||
At the moment you should have two seperate armatures and skeletons. Merging them allows one bone set to move both the outfit and your base body. The goal here is to first make the armatures match in terms of structure and bone names, and then move the meshes to the base body armature, and then set the armature of the mesh to the new one. CATS automates the moving and setting so I will be using that. | |||
# Rename every bone in the outfit armature to match the names of the base body armature. For example if the base body calls it ArmLeft and the outfit calls it ForeArmL, then that bone needs to be renamed. This is tedious but it saves pain later. Double click a bone in the top right to rename it. | |||
# For bones that don't exist; create them. (shift-e extrudes an existing bone in edit mode) Usually this will be 'root bones'- weightless bones that just act as a parent for use in Unity later with physbones. Make the weightless bone, then parent all the ones that should be to it (such as hair roots), in the green bone properties. | |||
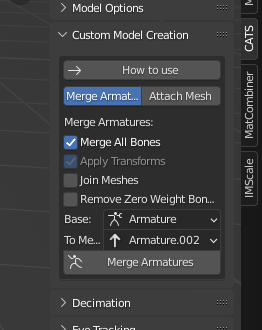
# CATS merge armatures can be used after the names match; make sure to UNTICK join meshes and UNTICK remove zero weight bones. I recommend having merge all bones and apply transforms ticked. | |||
# Should now have one armature with mesh all tied to it. Give pose mode a wiggle to check. If something doesn't move chances are you forgot to rename it. Note that you can no longer do pose mode adjustments as detailed above. | |||
'''Example screenshots (view the captions for comment)''' | |||
Basically just rename the outfit's bones to match your model. Not difficult, just tedious. Save often since there's a blender bug that causes it to crash when you try and rename stuff. If you notice, there's a breast_root in the base model but not on the outfit. This will be added. | |||
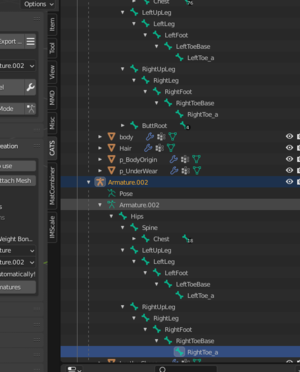
[[File:Tediousrename.png|frameless|tediously going through the bones and renaming them. This is worst for gloves.]] | |||
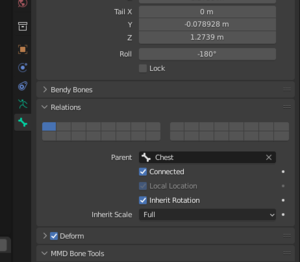
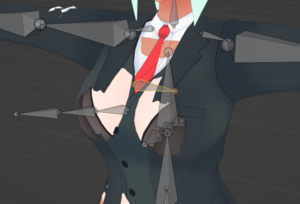
So what I did is make a new root bone (in edit mode). I selected the tiny little ball at the top of the chest bone, hit shift-e to extrude the bone, then locked it to axis y with y, then moved it out a little then clicked. I unconnected it from the chest, then rotated it by 90 and moved it somewhere roughly in the chest. As it's weightless it's just there to be visible. | |||
[[File:Selectlittleball.png|frameless|Hard to select the little ball and not the full bone; the full bone gave me extrutions at the top and bottom.]] [[File:Extruude.png|frameless|shift-e, lock to an axis like y, then click.]] [[File:Connected_to_false.png|frameless|in bone properties]][[File:Moved_to_location.png|frameless|Moved to a place, doesn't really matter as it's weightless.]] | |||
Then I parented the two breast bones to breast_root in the new armature. No pictures sorry. However anyway I kept renaming everything relevant. For example I stopped at the fingers as the outfit had no gloves. No point. Remove them from the outfit (you should have already) if still there. There was also no butt_root, but there was also no butt bones on the outfit either. Those will have to be weighted more manually. | |||
Then once everything was renamed, I merged. | |||
[[File:I_hate_it_but_it_works.png|frameless|Once names are all done, hit the armature merge.]][[File:Merge_armatures.png|frameless|These settings]][[File:One_armature.png|frameless|Once names are all done, hit the armature merge.]] | |||
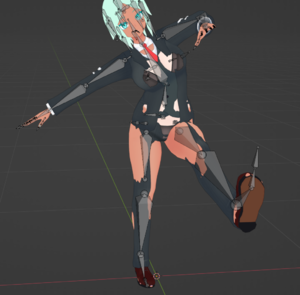
Then I gave it a wiggle to see how close I was. It's okay, nothing was forgotten this time. After this you would move onto sculpting and getting the mesh to fit your body. | |||
[[File:Give_it_a_wiggle.png|frameless|Types of wiggle]] | |||
'''Summary:''' | |||
* Rename outfit bones to match body bones, adding to or removing as needed. | |||
* Merge with cats, remember not to merge meshes (yet). | |||
Revision as of 13:48, 22 November 2022
This covers an example of what kind of operations are needed to put an outfit on a model. This will start with an outfit that is not rigged or sculpted for the base you're putting it on. In effect this is how to make a custom outfit, although if you do have a pre-made booth outfit you follow the same steps but skip most of them. Skills also can be used here to put on a hat or hair pin or something.
It will cover the following:
- Cleaning up an outfit for import
- Appending meshes into the same blender project
- Roughly getting the imported clothing the same size and shape as the base model
- Fine tuning the fit using sculpting/proportional editing/editing
- Weighting the outfit using data transfer and weighting cleanup techniques
- Shortcuts such as mesh deletion and shapekeys to prevent clipping
- Merging and optimising materials
- Exporting to FBX
- Importing into unity and copying over existing settings
- Cleanup and fixing scuff
Key skills: Merging, sculpting, materials, vertex groups, bones, pose, weighting, editing, export, pumkins tools,
Finding an outfit to Use
It gets easier the closer it is to your model's figure and shape, and the less mesh is actually present, and how much of the outfit is nearly skintight. Boobs tend to be the main factor in fitting clothing; outfits with boobs will have appropriate textures for big boobs with shadows and dense UVs for those areas. Fitting flatchest outfits to booba models will often result in very streeetched textures. fitting booba outfits to flat chest will often result in squieeshed textures and shadows for boobs that don't exist.
Anything can be used, but gamerips require more cleaning than anime girl outfits. They tend to have lots of unmerged vertexes, awkward UVs, and other tidbits that increase the difficulty. They will also have specific topology that won't match your model, resulting in more difficult weighting. Don't be put off but it is a pretty significant time investment to polish these.
Outfits specifically made for your model are easiest to fit and require little work. However ,they often need some cleaning/optimizing. Not everyone gets the whole "why does vrc perform so badly when everything in it is player made assets" thing.
Summary:
- Try and find outfits that are close to the body shape of the model
- Gamerips take more time and are higher difficulty
- Pre made outfits are pretty easy
Cleaning up an outfit for import
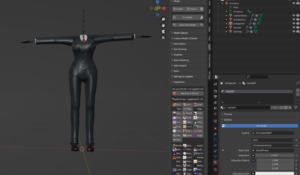
The goal of a pre-clean is to remove bits you don't need. This bit is reasonably simple:
- First take a look at the model, look at the shapekeys, the parts, the materials. Fix up the materials by adding textures if neccessary, and whatever.
- Delete mesh from the outfit that you do not need. Go into edit mode, and select mesh. See [Link to blender hotkeys] for mesh manipulation hotkeys, but I find ctrl-l to be the most handy. Using CATS to seperate the outfit by materials is also very useful for removing parts.
- Delete mesh from mesh objects or delete entire objects.
- Use ctrl-l to select all linked, circle (c) and box (b) select. Going into wireframe mode can help seeing the verts.
- Cats seperate by part/material can help cut the model into pieces for deletion.
- Delete unneeded bones in edit mode. Wiggle/move them in pose mode to check they don't affect anything any more. Select them in edit mode and delete them. shift-g when a bone is selected can help you select all children; and circle select (c) is handy for selecting multiple bones.
- Apply transforms. Blender sneakily also stores a position of mesh as an offset, and when merging two together, the offsets are reset. In object mode; ctrl-A and apply location,rotation and scale.
- Save this cleaned outfit as a .blend file.:
Summary:
- Take a look at the outfit.
- Delete stuff you don't want.
- Apply transforms.
- Save this as a .blend file
Preparing and Bringing together
Next step is to prepare your base model for the outfit. I recommend making a sub folder, and making a copy of your blend file there and working from that. Once you are done with the outfit it's easy to merge it back up and make it part of a set - although this is not recommended as it bloats avatars.
- Clean up the 'branch' of your base model the same way you did your clothing. Remove mesh and bones you don't need (I often leave underwear on while I'm working on it though). For full outfits, at least. For just a small addition, just remove what you are replacing, or maybe remove nothing at all. It makes it much easier to work on if all you have is the outfit and the base.
- Save the blend file in a subfolder. It helps having outfit related stuff sectioned off; especially since this is often a long process and I highly recommend making many iterative saves. Press ctrl-shift-s, hit the +, then save.
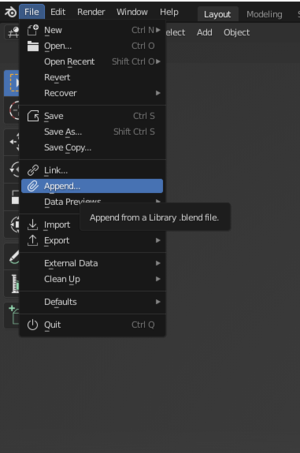
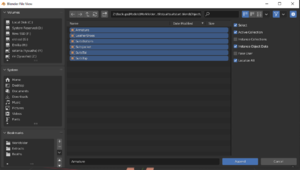
- To bring in the outfit, go to File --> Append, select your blend file, then go into objects, and select all the meshes and bring them in. This will give you two armatures. Leave them separate for now.
Summary:
- Clean up base model
- Save in subfolder
- Append clothing blend file onto base
Getting the Clothing Roughly in Shape
Skill: Pose mode modifications
Now that the blend file contains both the clothing and your base at the same time, the first step is to use pose mode to get them roughly aligned.
- Take a look at how different they are. Use the view controls like middle mouse button drag, zooming, and such to get a general feel of how close you are.
- Enter pose mode and select the hips. Move the clothing with transform - g - and lock the axis with y, x or z. Move it so the hips are roughly in the right location.
- Then use scaling. In pose mode, hit s, then z y or x to lock the axis. Concentrate first on getting the scale of the torso approximately right. Use the hip bone to get the butt roughly in the right place and size, then chest and then shoulders. When you change the scale of a bone it will change the scale of all the children of that bone by default. If you need to scale something other than the hips (EG the torso is too long) do parent bones first.
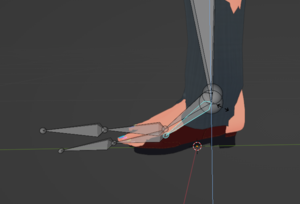
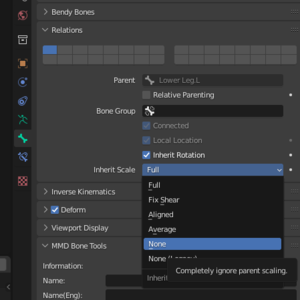
- To lock the scale of child bones, go into edit mode, select the bone and click the green bone icon in the properties pane. Change inherit scale to none for bones you don't want to be scaled. For example if you want to make the legs shorter without squishing the feet, disable scale inheritance, and then scale the bones. When doing legs and arms and such, look for the symmetry options up at the top right; you will want x symmetry.
- Tweak until roughly right. Sculpting and proportional editing will make the mesh much closer in shape.
- Press 'save as rest pose' to lock it in place. Remember to make regular iterative saves! (ctrl-shift-s, hit + icon)
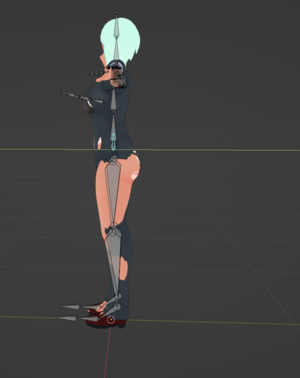
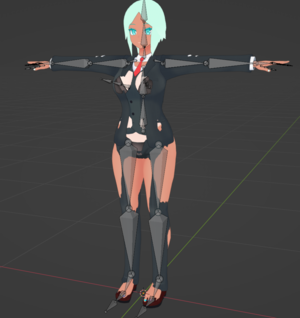
Example screenshots (view the captions for comment)
Getting started:
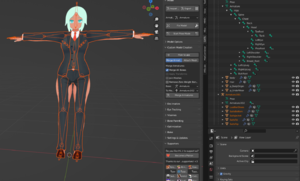
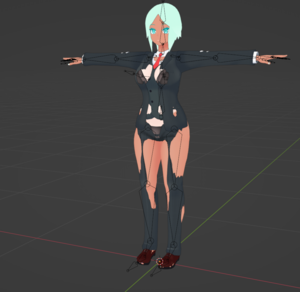
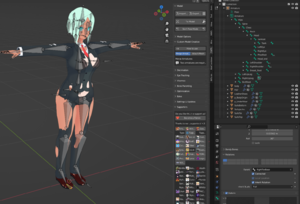
I lined up and scaled the outfit. First I moved it back, then I scaled it up or down a little so that the arms matched up a little more.
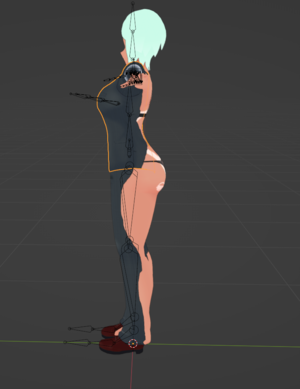
I somehow chose an outfit that was pretty damn close to my base model so not much here was needed. The shoulders match up and the hips are roughly in the right position. You can see that the pants are completely not thick enough but that gets sorted later. Note that if you're posing and stuff looks wrong, don't leave it like that.
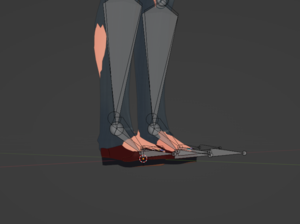
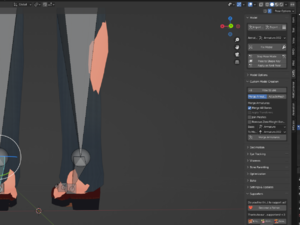
To change the shoes higher I will then move the legs up. However I don't want the shoes squished:
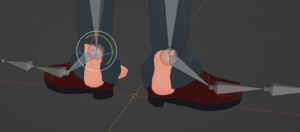
Then I moved the legs; select both legs with ctrl-click then s - z then moved. I also wanted to rotate the shoes, but I used symmetry. Hit the x symmetry next to the butterfly at the top right and whe you rotate a bone it does the mirror action. Symmetry is pretty important overall. As a rule; keep your base body symmetrical. Outfits rarely are.
And I just kept going, making small adjustments, then applying as rest pose until the overall shape and size was close:
Summary:
- Before merging armatures, use pose mode to squish and move the outfit to roughly match your model
- Scale (s) and move (g) and rotate (r) all allow locking axis with x y or z.
- Aim for shoulders and hips first
- Apply as rest pose when done
Merging Armatures
At the moment you should have two seperate armatures and skeletons. Merging them allows one bone set to move both the outfit and your base body. The goal here is to first make the armatures match in terms of structure and bone names, and then move the meshes to the base body armature, and then set the armature of the mesh to the new one. CATS automates the moving and setting so I will be using that.
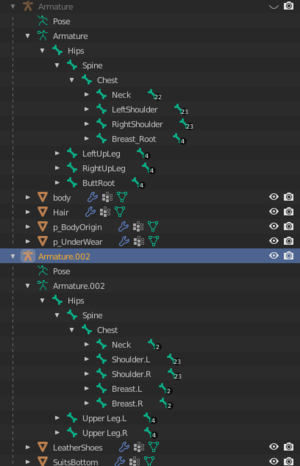
- Rename every bone in the outfit armature to match the names of the base body armature. For example if the base body calls it ArmLeft and the outfit calls it ForeArmL, then that bone needs to be renamed. This is tedious but it saves pain later. Double click a bone in the top right to rename it.
- For bones that don't exist; create them. (shift-e extrudes an existing bone in edit mode) Usually this will be 'root bones'- weightless bones that just act as a parent for use in Unity later with physbones. Make the weightless bone, then parent all the ones that should be to it (such as hair roots), in the green bone properties.
- CATS merge armatures can be used after the names match; make sure to UNTICK join meshes and UNTICK remove zero weight bones. I recommend having merge all bones and apply transforms ticked.
- Should now have one armature with mesh all tied to it. Give pose mode a wiggle to check. If something doesn't move chances are you forgot to rename it. Note that you can no longer do pose mode adjustments as detailed above.
Example screenshots (view the captions for comment)
Basically just rename the outfit's bones to match your model. Not difficult, just tedious. Save often since there's a blender bug that causes it to crash when you try and rename stuff. If you notice, there's a breast_root in the base model but not on the outfit. This will be added.
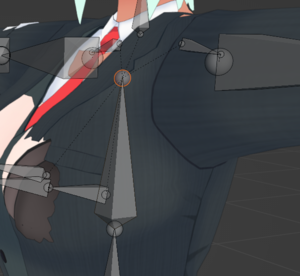
So what I did is make a new root bone (in edit mode). I selected the tiny little ball at the top of the chest bone, hit shift-e to extrude the bone, then locked it to axis y with y, then moved it out a little then clicked. I unconnected it from the chest, then rotated it by 90 and moved it somewhere roughly in the chest. As it's weightless it's just there to be visible.
Then I parented the two breast bones to breast_root in the new armature. No pictures sorry. However anyway I kept renaming everything relevant. For example I stopped at the fingers as the outfit had no gloves. No point. Remove them from the outfit (you should have already) if still there. There was also no butt_root, but there was also no butt bones on the outfit either. Those will have to be weighted more manually.
Then once everything was renamed, I merged.
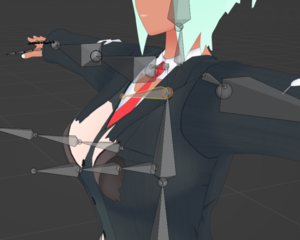
Then I gave it a wiggle to see how close I was. It's okay, nothing was forgotten this time. After this you would move onto sculpting and getting the mesh to fit your body.
Summary:
- Rename outfit bones to match body bones, adding to or removing as needed.
- Merge with cats, remember not to merge meshes (yet).
