Add outfit: Difference between revisions
| (13 intermediate revisions by the same user not shown) | |||
| Line 1: | Line 1: | ||
[[Category: VRChat]] | |||
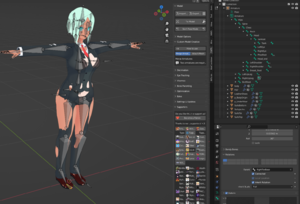
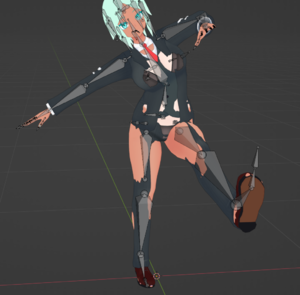
This covers an example of what kind of operations are needed to put an outfit on a model. This will start with an outfit that is not rigged or sculpted for the base you're putting it on. In effect this is how to make a custom outfit, although if you do have a pre-made booth outfit you follow the same steps but skip most of them. Skills also can be used here to put on a hat or hair pin or something. | This covers an example of what kind of operations are needed to put an outfit on a model. This will start with an outfit that is not rigged or sculpted for the base you're putting it on. In effect this is how to make a custom outfit, although if you do have a pre-made booth outfit you follow the same steps but skip most of them. Skills also can be used here to put on a hat or hair pin or something. | ||
| Line 27: | Line 29: | ||
Outfits specifically made for your model are easiest to fit and require little work. However ,they often need some cleaning/optimizing. Not everyone gets the whole "why does vrc perform so badly when everything in it is player made assets" thing. | Outfits specifically made for your model are easiest to fit and require little work. However ,they often need some cleaning/optimizing. Not everyone gets the whole "why does vrc perform so badly when everything in it is player made assets" thing. | ||
Summary: | '''Summary:''' | ||
* Try and find outfits that are close to the body shape of the model | * Try and find outfits that are close to the body shape of the model | ||
| Line 48: | Line 50: | ||
[[File:cleanedoutfit.png|thumb|A cleaned outfit. Still in pieces, but doesn't have useless mesh or bones.]] | [[File:cleanedoutfit.png|thumb|A cleaned outfit. Still in pieces, but doesn't have useless mesh or bones.]] | ||
Summary: | '''Summary:''' | ||
* Take a look at the outfit. | * Take a look at the outfit. | ||
| Line 65: | Line 67: | ||
[[File:appendit.png|frameless|to append to a blend file]] [[File:selecteverythingfromobjec.png|frameless|select all objects]] [[File:Willappearlikethis.png|frameless|will appear something like this]] | [[File:appendit.png|frameless|to append to a blend file]] [[File:selecteverythingfromobjec.png|frameless|select all objects]] [[File:Willappearlikethis.png|frameless|will appear something like this]] | ||
Summary: | '''Summary:''' | ||
* Clean up base model | * Clean up base model | ||
* Save in subfolder | * Save in subfolder | ||
| Line 74: | Line 76: | ||
Skill: Pose mode modifications | Skill: Pose mode modifications | ||
Now that the | Now that the blend file contains both the clothing and your base at the same time, the first step is to use pose mode to get them roughly aligned. | ||
# Take a look at how different they are. Use the view controls like middle mouse button drag, zooming, and such to get a general feel of how close you are. | |||
# Enter pose mode and select the hips. Move the clothing with transform - g - and lock the axis with y, x or z. Move it so the hips are roughly in the right location. | |||
# Then use scaling. In pose mode, hit s, then z y or x to lock the axis. Concentrate first on getting the scale of the torso approximately right. Use the hip bone to get the butt roughly in the right place and size, then chest and then shoulders. When you change the scale of a bone it will change the scale of all the children of that bone by default. If you need to scale something other than the hips (EG the torso is too long) do parent bones first. | |||
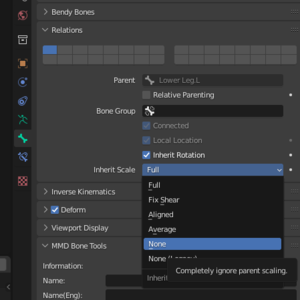
# To lock the scale of child bones, go into edit mode, select the bone and click the green bone icon in the properties pane. Change inherit scale to none for bones you don't want to be scaled. For example if you want to make the legs shorter without squishing the feet, disable scale inheritance, and then scale the bones. When doing legs and arms and such, look for the symmetry options up at the top right; you will want x symmetry. | |||
# Tweak until roughly right. Sculpting and proportional editing will make the mesh much closer in shape. | |||
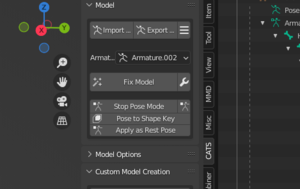
# Press 'save as rest pose' to lock it in place. Remember to make regular iterative saves! (ctrl-shift-s, hit + icon) | |||
'''Example screenshots '''(view the captions for comment) | |||
Getting started: | |||
[[File:nottoobad.png|frameless|This one started pretty close but you can see it's offset]] [[File:enterposemodeonnewarmature.png|frameless|Enter pose mode with CATS]] | |||
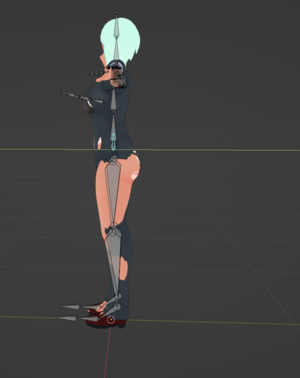
I lined up and scaled the outfit. First I moved it back, then I scaled it up or down a little so that the arms matched up a little more. | |||
[[File:start_with_hips.png|frameless|moved the outfit with g -z and it lines up pretty well already]][[File:Surprisinglyclose.png|frameless|I looked at how close it was and it was pretty close. Observatons: not thicc enough, and the shoes are too low.]] | |||
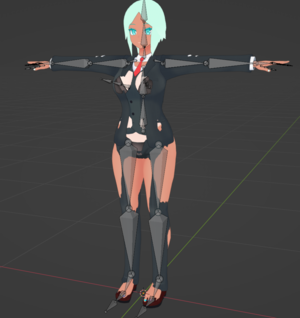
* | I somehow chose an outfit that was pretty damn close to my base model so not much here was needed. The shoulders match up and the hips are roughly in the right position. You can see that the pants are completely not thick enough but that gets sorted later. Note that if you're posing and stuff looks wrong, don't leave it like that. | ||
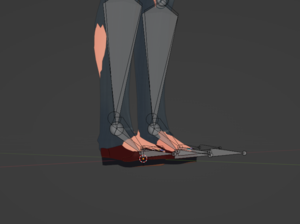
To change the shoes higher I will then move the legs up. However I don't want the shoes squished: | |||
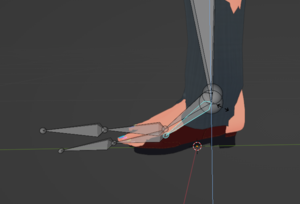
[[File:Shoescouldbehigher.png|frameless|Shoes too low.]][[File:Selecttheboneyouwant.png|frameless|Shoes too low.]][[File:Changeinheritscale.png|frameless|For the bone you don't want affected, select bone, then go into green bone properties and turn inheritance off. Because that bone isn't changing it also won't affect child bones of that bone.]] | |||
Then I moved the legs; select both legs with ctrl-click then s - z then moved. I also wanted to rotate the shoes, but I used symmetry. Hit the x symmetry next to the butterfly at the top right and whe you rotate a bone it does the mirror action. Symmetry is pretty important overall. As a rule; keep your base body symmetrical. Outfits rarely are. | |||
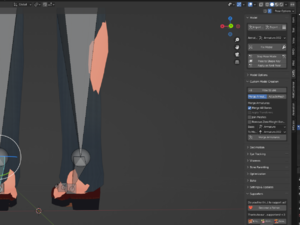
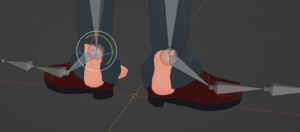
[[File:Symmetrybuttonontopright.png|frameless|Tiny x button]][[File:Nowitdoesthis.png|frameless|mirror symmetry.]] | |||
And I just kept going, making small adjustments, then applying as rest pose until the overall shape and size was close: | |||
[[File:Closeshapeandsize.png|frameless|more or less done]] | |||
'''Summary:''' | |||
* Before merging armatures, use pose mode to squish and move the outfit to roughly match your model | |||
* Scale (s) and move (g) and rotate (r) all allow locking axis with x y or z. | |||
* Aim for shoulders and hips first | |||
* Apply as rest pose when done | |||
==Merging Armatures== | |||
At the moment you should have two seperate armatures and skeletons. Merging them allows one bone set to move both the outfit and your base body. The goal here is to first make the armatures match in terms of structure and bone names, and then move the meshes to the base body armature, and then set the armature of the mesh to the new one. CATS automates the moving and setting so I will be using that. | |||
# Rename every bone in the outfit armature to match the names of the base body armature. For example if the base body calls it ArmLeft and the outfit calls it ForeArmL, then that bone needs to be renamed. This is tedious but it saves pain later. Double click a bone in the top right to rename it. | |||
# For bones that don't exist; create them. (shift-e extrudes an existing bone in edit mode) Usually this will be 'root bones'- weightless bones that just act as a parent for use in Unity later with physbones. Make the weightless bone, then parent all the ones that should be to it (such as hair roots), in the green bone properties. | |||
# CATS merge armatures can be used after the names match; make sure to UNTICK join meshes and UNTICK remove zero weight bones. I recommend having merge all bones and apply transforms ticked. | |||
# Should now have one armature with mesh all tied to it. Give pose mode a wiggle to check. If something doesn't move chances are you forgot to rename it. Note that you can no longer do pose mode adjustments as detailed above. | |||
'''Example screenshots (view the captions for comment)''' | |||
Basically just rename the outfit's bones to match your model. Not difficult, just tedious. Save often since there's a blender bug that causes it to crash when you try and rename stuff. If you notice, there's a breast_root in the base model but not on the outfit. This will be added. | |||
[[File:Tediousrename.png|frameless|tediously going through the bones and renaming them. This is worst for gloves.]] | |||
So what I did is make a new root bone (in edit mode). I selected the tiny little ball at the top of the chest bone, hit shift-e to extrude the bone, then locked it to axis y with y, then moved it out a little then clicked. I unconnected it from the chest, then rotated it by 90 and moved it somewhere roughly in the chest. As it's weightless it's just there to be visible. | |||
[[File:Selectlittleball.png|frameless|Hard to select the little ball and not the full bone; the full bone gave me extrutions at the top and bottom.]] [[File:Extruude.png|frameless|shift-e, lock to an axis like y, then click.]] [[File:Connected_to_false.png|frameless|in bone properties]][[File:Moved_to_location.png|frameless|Moved to a place, doesn't really matter as it's weightless.]] | |||
Then I parented the two breast bones to breast_root in the new armature. No pictures sorry. However anyway I kept renaming everything relevant. For example I stopped at the fingers as the outfit had no gloves. No point. Remove them from the outfit (you should have already) if still there. There was also no butt_root, but there was also no butt bones on the outfit either. Those will have to be weighted more manually. | |||
Then once everything was renamed, I merged. | |||
[[File:I_hate_it_but_it_works.png|frameless|Once names are all done, hit the armature merge.]][[File:Merge_armatures.png|frameless|These settings]][[File:One_armature.png|frameless|Once names are all done, hit the armature merge.]] | |||
Then I gave it a wiggle to see how close I was. It's okay, nothing was forgotten this time. After this you would move onto sculpting and getting the mesh to fit your body. | |||
[[File:Give_it_a_wiggle.png|frameless|Types of wiggle]] | |||
'''Summary:''' | |||
* Rename outfit bones to match body bones, adding to or removing as needed. | |||
* Merge with cats, remember not to merge meshes (yet). | |||
== Fit Fine Tuning - Sculpting, Proportional editing, == | |||
Skills: Sculpting | |||
The goal with this is to take the loose fit and match the meshes up using sculpting tools. This is the step you will get the stationary look correct; wrapping the outfit to the body, squishing parts of a hat to match the head shape, expanding or contracting areas, and so on. The key to doing this is to split up the outfit into small components. | |||
The general process is below: | |||
# '''Split the outfit into parts.''' Visualise how you will split the outfit up. Generally this should be do it piece by piece from disconnected outfit parts; wriststraps, gloves, boots, hats, tops, bottoms; split it up into logically connected parts as much as possible. Make them seperate mesh objects; go into edit mode, select the vertexes that make up that 'part', and then press p and split it into a new component. It helps me to name these components. | |||
# For each of these parts, you will very often want to use 'merge by distance'. In edit mode, select the vertexes, then hit 'm', then click 'by distance'. This helps to ensure that they are actually one piece of connected mesh. Vertexes that are in the same place but different will drift apart from each other during editing. | |||
# '''Edit the mesh''' using sculpting, proportional editing or regular editing, (See below) | |||
# '''Modify the mesh to fit over your body'''. The closer the fit the harder weighting will be but initially concentrate on getting it looking decent. | |||
=== Sculpting === | |||
Sculpting lets you pull, drag, twist, rotate, squeeze, smooth, etc etc mesh in a clay-like fashion. Most useful when the shape you want to make is complex. | |||
# Go into sculpt mode; There's a sculpting tab in newer blender that is worth using, but sculpt mode can also be entered by selecting the mesh object and switching the mode. | |||
# The tools most used by myself are elastic deform and grab. Start with elastic deform and start pulling your mesh around over your avatar. Use "." on the numpad to zoom into an area, adjust the radius and use the scroll wheel to zoom in and out to affect more or less mesh at once. Pull mesh out from under your body until it is over, and push it in where it is too far out. | |||
General Tips: | |||
* Use x mirror (the butterfly at the top righT) to mirror sculping changes. Turn it on forwhen you're working on a symettrical part and off for when it is not. | |||
* <Insert trcik to make it transparent here* | |||
* Set the rendering options to use random color instead of texture if theclothing and skin are too similar to see clearly. | |||
* Zooming in and out, using "." on the numpad to focus, and general moving around and seeing it from different angles will help getting it look okay. | |||
* Use the radius to change the size of the sculpting brush. | |||
* Pull stuff out to match the general shape first - broad strokes, and then fine tune. | |||
* Most suited for larger pieces of clothing; sculpting flat, boxy objects will often make them lose their clean edges. | |||
* Playing with the various tools is recommended since they can give better results for certain operations; EG "Pose" works quite well for moving ties, strands of hair, ribbons etc. "Smooth" is pretty good for unroughing an area, but it tends to shrink an area a bit. | |||
* Vary the strength of tools for more fine control. | |||
* trial and error will be your best friend, get comfortable with the ctrl-z and saving a copy to grindyour way to a mesh that looks okay. | |||
* For solid objects like buttons it is best to seperate them out and move them around with editing so they don't get all squished and squashed by scultping. It's hard to restore a pretty shape once destroyed. | |||
* Keep things in pieces. | |||
* Keep an eye on the topology near joints. Most mesh has a denser region, or differing topology near joints and when squeezing and squishing you will want to keep those denser regions near the joints on your base model; most notably with gloves. (Avoid gloves if you can) | |||
=== Proportional Editing === | |||
This lets you drag a vertex or group of vertexes around and then have other vertexes also move proportional to how close they are to the moved bits. Useful for squishing and squashing, draging and general fit adjustments. Such as adjusting a collar. | |||
# To turn on proportional editing, go into edit mode then click the little circles at the top. | |||
# Important: Zoom out and use the scroll wheel to adjust the radius for the adjustment. By default the radius is so huge that your entire mode is included and all you do is yeet your mesh around awkwardly. | |||
# Select a vertex or group of vertexes and use transform tools; move (g), scale (s), rotate (r) and mesh around it will be dragged along. proportionally. | |||
# For example if you select a line of vertexes down your collar, you can squish the collar back and forward by using g, then hitting x or y to lock the axis, then moving the mouse around. | |||
General tips | |||
* X mirror helps here too. Turn this on when editing symmetrical mesh. | |||
* Sculpting grants more diversity in mesh movements; this is basically limited to squish around. | |||
=== Editing === | |||
Alternaively moving around vertexes piece by piece is a viable way to do fine tuning and moving solid objects like armor plates or buttons. | |||
# Enter edit mode (and make sure proportional editing is off) | |||
# Select the vertexes you want to modify. This could be a ring, a collar, a shoulder armor piece, a belt buckle, etc. Solid items for wholesale movement or a small number of vertexes for fine tuning of the toplogy work best. | |||
# Move/Scale/Rotate them around until it looks better. Rotate around the model and check from multiple angles. | |||
Selection and movement hotkeys: | |||
* Selection: Box (b), circle (c). Use middle mouse button in circle select mode to unselect vertexes. | |||
** Can also shift/ctrl click individual vertexes to select them. | |||
** Ctrl-L will select ''all linked vertexes''. If you have any unlinked vertexes you will find out with this. (Use merge by distance to merge overlapping vertexes) | |||
** Alt-Click can select a loop but with clothing and weird toplogy this might not be the most useful. | |||
** Set the view to wireframe when selecting verts to make sure you got them all | |||
== Weight Painting == | |||
Weights are what bind the armature and the mesh together. When the bones are moved (in pose mode or in game) the mesh moves with it, and how much this moves is dependent on weighting, which is a heat map that is applied to the mesh a bit like a texture. Understanding that a bone is weighted to the mesh, so that when the bone rotates, trasforms, or scales, the mesh changes the same way but according to the weighting specified will help you with weighting. | |||
You should already know that bones are assigned to the mesh via vertex groups. These are the sections of mesh that are registered to that bone; and they're registered by having the same name (case sensitive). <Unsure>: If you try and add weights to a mesh from a bone to a mesh not in that vertex group, blender will expand the group automatically to cover the new weight. Overall you don't need to worry about the details of a vertex group much since it is more important that it has one to apply weighting to. | |||
Weight painting is usually a very long tedious process but if you take a methodical approach you will at least usually make a weighting better rather than worse. Experience will make you faster at recognising what to do. | |||
The process can be split up as follows: | |||
# Take a look at what you have already | |||
# Data Transfer (Weight Transfer) - Get a cheating head start | |||
# Weight big chunks/ entire vertex groups (easy wins) | |||
# Actual Paint weighting | |||
# Fine tuning | |||
I'll include some additional info such as some tidbits on from scratch weighting and maybe some extra stuff that's useful. | |||
=== Entering Weight Paint Mode === | |||
It's not intuitive to enter weight paint mode so I recommend learning a setup for it. Mine is as follows: | |||
# Ensure edit-> lock object modes is off | |||
# Go into pose mode then select a bone | |||
# Then select a mesh and enter weight paint mode | |||
If done properly you should see the highlighted bone and the weights on the mesh. | |||
* Ctrl-click other bones to switch between a bone. | |||
* Press r to rotate a bone and see live what weighting is doing to the mesh | |||
* alt-r resets a rotation | |||
* m enters mask mode where you can individually select faces to avoid weighting the wrong mesh | |||
=== See what you have already === | |||
This step is simple. You wiggle the model's bones around in pose mode and see how good the weighting is already. At this point the mesh should '''look''' at least statically correct. | |||
# Select the armature and go into pose mode (click armature or pose in the top right, then change the mode to pose) | |||
# Wiggle the bones around (alt-r resets the rotation of the bone) | |||
# Look for issues: | |||
* Stuff that doesn't move but should | |||
* Stuff that does move but shouldn't | |||
* Stuff that moves too much | |||
* Stuff that doesn't move enough | |||
Those are also the general categories of issues: depending on the scale of how bad the weighting is changes your approach. | |||
Tips: | |||
* If you're inexperienced you can use this to take a look and see how moving the bone around pulls the mesh around and how it compares to how it is weighted. | |||
* Transforming the bones with g and moving them away from the model is useful to see very subtle weighting that shouldn't be there. | |||
* If the mesh doesn't move at all and looks like it is weighted; check that the mesh has the armature set. Select the mesh, go to 'modifier properties' (blue wrench) and check the armature modifier. Add if it neccessary, and ensure the object is set to the right armature. | |||
<todo: Some examples> | |||
=== Big Changes === | |||
For objects like armor pieces, hats, rings, and to a lesser extend shoes - ''objects that don't bend'' but just need to be attached to something - you can weight the entire mesh to a bone. When you do this, when the bone that the object is attached to moves, the entire object moves as if glued to the bone. | |||
====Via Vertex Groups==== | |||
# Enter Edit mode | |||
# Select the mesh of the object. Seperate it out into its own mesh (if it isn't already). | |||
# In Object Data Properties (Upsidedown green triangle) find "Vertex Groups" | |||
# Find the vertex group of the bone you want (or create it). Use select and deselect to identify vertexes in that group (if any) | |||
# In edit mode, the "assign" and "remove" buttons for the vertex groups mean assign/remove vertexes to that group with the weight specified. If you click assign on a vertex group it will assign all those vertexes to be weighted to the bone and remove will do the opposite. If you switch between edit and weight paint mode you can see the colour change from blue to red, with red being fully weighted and blue not. Rotate the bone in pose mode between the two to get a sense of what you did. | |||
This is the more complete method and represents a more direct way to manipulate vertex groups. | |||
====Via Weight Painting==== | |||
# First check that the mesh is seperated out, and that there is a bone ready for the mesh to be weighted to. For example for a hat, you would want to weight it completely to the head (unless there are wiggly bits on the hat). Or for a ring, completely to the finger, or a armor piece completely to the limb or chest. | |||
# Enter weight paint mode with the bone you want to weight the mesh to. (See above) | |||
# You should see the selected bone and the mesh; if it is purple this means there is a null weight assigned (blue is zero, red is 100%) - If you check it has a vertex group or try painting it <unverified lmao> it will probably start getting data and turn blue/red. | |||
# Go to "tools" on the right panel (n hides and unhides it) and select add | |||
# Set the strength to 1.0 and paint on your object. Note that when you paint you are changing the weight value of vertexes, the value each one has is reperesented by a heat map that covers the faces, but remember you are painting the vertexes. | |||
# Rotate the view around, and make sure all the mesh is painted solid red. | |||
# Rotate the object as you're working with r, and reset the rotation with alt-r. | |||
# You'll be done when it's all painted. | |||
This is more of a brute force method that works to intro yourself to weight painting with a very easy example and use of the tools. | |||
=== Data Transfer === | |||
This is a method of skipping some weighting by using the weighting of something else, in this case the base body, and pasting it onto the weighting of the outfit. This works by projecting the weights outwards, and is a destructive process to the weights that were there already. | |||
Terminology wise; there will be two meshes that share an armature, with a source mesh and a destination mesh. The destination should have vertex groups already created. | |||
# Seperate out all mesh you don't want the weight replaced on; like solid pieces like hats, or parts that are actually weighted pretty well already. | |||
# Give the stuff you're working on a wiggle in pose mode to see what the weighting is like before the operation. And look at it in weight paint mode. | |||
# Select the destination mesh and select modifier properties (blue wrench) | |||
# Add modifier --> Data Transfer | |||
# Select the Source object as the mesh you want to pull weight data from (base body usually) | |||
# Tick 'Vertex Data', open the submenu and select 'vertex groups'. This will slap vertex group data from source vertex group to destination vertex group. "Generate Data Layers" is supposed to do something but when I was testing it, it wasn't making vertex groups or doing anything. | |||
# If you enter weight paint mode you might be able to see the weights appear on the mesh, but don't count on it. | |||
# Make sure you're in object mode, and press the little down arrow (v shape) next to the x, and press apply. This ''should'' apply the weighting. | |||
# Enter pose mode and give the model a wiggle again; if it changed then it worked. Sometimes it doesn't work for me and I think it's because I hit apply in the wrong mode or have the wrong thing selected, or something. Try again a few times if it didn't work. | |||
# Data transfer weights usually come out kinda blocky; so that's a way to tell it worked. | |||
# Check the weighting. If it got better, great. If it got worse, revert. Either way it's likely not going to be perfect. | |||
# Enter weight paint mode, and use the blur tool over each bone's weighting. OR try the Weights > Smooth option, and fiddle with the parameters. | |||
# Wiggle again. | |||
Tips: | |||
* Like all weight painting, regularly wiggling bones around is going to be important to checking weighting. Check the weight fine tuning section for a more methodological approach. | |||
* data transfer transfers weights by projection; it is very likely that lots of mesh will be painted when it shouldn't be at all; like collar bits, ribbons, cuffs, etc. | |||
* It also might fail to weight a few things usually if you forgot a vertex group. Gross weighting can be used to decent effect. | |||
====Robust Weight Transfer==== | |||
A third party addon (Free) was released that looks like it transfers weights far more effectively. | |||
https://github.com/sentfromspacevr/robust-weight-transfer | |||
After actually trying this I can say you should definitely use it. It's free and works way better than standard weight transfer. | |||
* Download the correct version from 'releases' for the version of blender you use (important). | |||
* Edit -> Preferences -> Addons, then find and install and activate it. | |||
* It should appear on the tools tab, don't look in modifiers. | |||
* It works the same as data transfer; the selected object should take weights from the object you choose; with some vertex group filters if you want to do that. There's smoothening options and I always just ticked it and it was fine. | |||
* Some minor weight painting will often be needed after this tool as always, but this saved me hours of weight painting when I used it; skipping right to minor touchups. | |||
=== Gross Weighting === | |||
This is between the big changes and the fine tuning, this is general painting of weights. Useful for fixing bits of mesh that are weighted that shouldn't be (such as from data transfer), for weighting entire patches and areas. Life for example you have a ribbon that you want to add bones to so it can wiggle, or your outfit doesn't have a butt wiggle area but your body does. | |||
When weighting, you should also consider bone position. The bone's location should be at the core of where the moving mesh should be; any weighted mesh to that bone will be stapled in its relative position to the bone. For example, if you weighted a finger to a leg bone, when the leg bone moves, the finger would rorate around the axis that the bone moves; causing the finger to fly off. Like the bone was actually a sphere and you were katamari'ing pieces to it. Rotate a joint of meat in your mind, the cops can't stop you. Also consider that child bones of a parent bone will rotate as if they were completely weighted to the parent; for example when you rotate the lower leg, the foot goes with it, then when you rotate the foot, only everything under the toe bone moves. | |||
Some bones are meant to have no weights. These are usally either to act as a root bone; a joined parent so that in unity physbone scripts can act on the entire wreath of chains with one component, or as a leaf bone; a ghost bone that is there for physbone or dynamic bones so they wiggle at the end. | |||
# Seperate out the mesh you want to weight | |||
# Enter weight paint mode for the bone you are working on (see above) | |||
# Rotate around the bone to get a sense of its place in 3D space. Consider what you want to move when the bone rotates and what you don't want to move. You can take a look at other weighted things on your base body to get a sense for what it should probably look like; in general for something like a limb or a ribbon you want the bone inside the part and when a ring of red around th | |||
e core of the bone, with it getting gradually less hot as it gets away from where the bone is. | |||
# Enable options -> auto normalize (In the 'n' menu Tool section on the right) - This adjusts other vertex groups appropriately: If you paint a bone to have some weight that overlaps with another bone's, it'll subtract that bone's weight. Useful to not having weird weights. | |||
# In weight paint mode, select the brush, and use the add or subtract tools to paint on an appropriate weighting. Adjust the strength where neccessary. | |||
# Give the bone a wiggle with r and paint some more. | |||
# Repeat this process until it looks fairly close; if it's overlapping or something just a little you can do fine tuning which will be covered later. | |||
# Use the blur tool to smooth out messy looking weighting. | |||
General tips: | |||
* I have not figured out weighting symmetry yet. My best solution is to weight one half, then duplicate it, mirror it, and then rename the vertex groups of the copy to the 'left' versions so that the weights apply mirrored like. | |||
* The guidance here is pretty vague because accuracy doesn't need to be high. This is most useful for very rough weighting, or weighting something that won't be clipping. | |||
* For a breast or butt bone, the weighting will be a circular patch around the tip of the bone in most cases. Check the body base. | |||
* Move the object around with g (transform) to chekc you haven't added weighting somewhere you shouldn't have. | |||
* There is a gradient tool you could make use of but I've only really found it useful for end pieces. If there is a 'inverse gradient' or 'deletion gradient' option I can't find it. | |||
* Don't try and get it perfect, you can fine tune weighting easier with another technique. | |||
* Autoriggers exist to help map weights to a bone; and there is some autoweighting built into blender. If you have any experience with this please add an entire section. | |||
Example: | |||
Dragging bones allows you to easily find weighting that should not be. In the below example I dragged the right leg out into the distance, and one vertex on the left leg popped out as it had a very slight weight that may not have been noticed elsewise. In this position I'd use the paint tool on subtract to blap the vertex popping out back to zero. | |||
[[File:Draggingallowsfindingthestraywerigghts.jpg|frameless|Tiny x button]] | |||
=== Weight Fine Tuning === | |||
Using masking it is possible to seperate weighting out and tune it vertex by vertex in a methodological way. This is what I spend most of my weighting time doing, and while tedious, gets weighting to a point where you can make progress instead of making things worse constantly. This is mainly in this context to fix clipping issues. | |||
Most of the progress you will make will be balancing vertexes between the two concepts: Is this vertex moving too much or is this vertex not moving enough. If it is moving too much, hit that vertex with a little subtract of weighting, and if it's moving no | |||
t enough, up the weighting a bit. | |||
Also keep in mind again that you are changing the weight values on the vertexes, not edges or faces. Often times, mismatching topology will result in mesh coming in from underneath through an edge or face, and the solution for you is to adjust the weights | |||
of the vertexes until they pull the face or edge out of the intersection. | |||
# Enter weight paint mode on the bone you want to weight. | |||
# Wiggle the bone around with r. It should be roughly correct, with some minor intersections and problems. If it's completely of | |||
f, go back to a more gross scale of painting. | |||
# Break down the weight problems into the three axis; Hit r --> x for example to lock the rotation axis to x. Do the same with y and z and give them a look. | |||
# Choose an axis to start (I recommend one of the axis that don't cause the mesh to twist up like wringing a cloth) | |||
# First reset the rotation with alt-r. It should look fine since you're weighting now. If there's any overlap on a neutral rotat | |||
ion you need to edit the mesh. | |||
# Enter mask mode with m. There's a button in the top left of weight paint mode that does the same thing. You should see that the faces have become white. Click on a face to select it, causing it to gain color, and each of the vertexes can now be affected by the weight paint tools. | |||
# Rotate the bone you are working on locked to one axis until you see clipping. Scale the rotation back until it's barely clipping. | |||
# Select one of the clipping faces | |||
# Using either add or subtract set to a strength of 0.05 to 0.1, adjust the weight of the vertexes. Rotate the bone very slightly over your chosen axis and watch the vertexes. If they move too much and cause clipping, clikc them with the subtract tool on a very weak setting until clipping stops. If they don't move enough, add more weight to the vertexes surrounding the face. | |||
# Repeat this for all clipping, and then bend the bone a bit more and repeat the process. | |||
# Keep going until you have eliminated clipping up until where the bone's natural motion ends. If you're not going to bend the bone that far in game naturally then don't bother fixing clipping as realistically you are not going to bend your knee '''forwards''' in game. | |||
# Give the weights a touch with the blur tool when you're "done" and give it another round. USUALLY this doesn't do much damage. But this is optional as if it looks fine when it bends who cares. | |||
General tips: | |||
* Sometimes the technique fails. In these cases, switch to sculpt mode and pull the mesh away from the base body a bit more until it stops clipping. Try not to pull it out too much but in my experience this works well as a small cheat. | |||
* Extreme topology mismatches will be very hard if not impossible to fix. For example, if the base has 5 polygons bending it will bend in a smooth curve, but if the outfit only has one polygon covering that area, the weighting will just cause the vertexes to pull the face down through the curved area in a straight line. The only way around this is to subdivide the affected area a bit. I've not got a good way to do this though so try to avoid needing to do this if you can. | |||
* This is a very tedious process but you will make progress, and you'll get faster and better with experience. | |||
* The difficulty varies greatly with the topology of the outfit. Putting on gamerip outfits and MMD outfits will usually be tricky as the toplogy will be different and it will simply bend differently even when finely adjusting the weighting. | |||
Example: | |||
I've got video of me doing this | |||
<todo> | |||
=== Weight Via Movement === | |||
Another technique to get a 'reasonably close' weight is to move the bone (in pose + weight painting mode) with 'g' and then along an axis x, y or z. If you slide the bone around you can see where the clothing is moving more than the skin, and where it is moving less. | |||
Where it is moving too much, you hit it with a little bit of 'subtract' at a very weak power, like 0.05, until it is moving just the right amount. Or if it is not moving enough, you hit it with 'add' at weak power. You can use blur and average tools here to blur out the inevitably janky work you're doing. | |||
You can move the bone as far as you like, but you only need to weight to a bit of movement, not the extreme. This technique is good for getting the weighting reasonably close to where it should be in a reasonably short amount of time. I typically do this right after weight transfer or when I'm just trying to weight from scratch. | |||
[[Category:VRChat Tutorials]] | |||
Latest revision as of 10:40, 13 September 2024
This covers an example of what kind of operations are needed to put an outfit on a model. This will start with an outfit that is not rigged or sculpted for the base you're putting it on. In effect this is how to make a custom outfit, although if you do have a pre-made booth outfit you follow the same steps but skip most of them. Skills also can be used here to put on a hat or hair pin or something.
It will cover the following:
- Cleaning up an outfit for import
- Appending meshes into the same blender project
- Roughly getting the imported clothing the same size and shape as the base model
- Fine tuning the fit using sculpting/proportional editing/editing
- Weighting the outfit using data transfer and weighting cleanup techniques
- Shortcuts such as mesh deletion and shapekeys to prevent clipping
- Merging and optimising materials
- Exporting to FBX
- Importing into unity and copying over existing settings
- Cleanup and fixing scuff
Key skills: Merging, sculpting, materials, vertex groups, bones, pose, weighting, editing, export, pumkins tools,
Finding an outfit to Use
It gets easier the closer it is to your model's figure and shape, and the less mesh is actually present, and how much of the outfit is nearly skintight. Boobs tend to be the main factor in fitting clothing; outfits with boobs will have appropriate textures for big boobs with shadows and dense UVs for those areas. Fitting flatchest outfits to booba models will often result in very streeetched textures. fitting booba outfits to flat chest will often result in squieeshed textures and shadows for boobs that don't exist.
Anything can be used, but gamerips require more cleaning than anime girl outfits. They tend to have lots of unmerged vertexes, awkward UVs, and other tidbits that increase the difficulty. They will also have specific topology that won't match your model, resulting in more difficult weighting. Don't be put off but it is a pretty significant time investment to polish these.
Outfits specifically made for your model are easiest to fit and require little work. However ,they often need some cleaning/optimizing. Not everyone gets the whole "why does vrc perform so badly when everything in it is player made assets" thing.
Summary:
- Try and find outfits that are close to the body shape of the model
- Gamerips take more time and are higher difficulty
- Pre made outfits are pretty easy
Cleaning up an outfit for import
The goal of a pre-clean is to remove bits you don't need. This bit is reasonably simple:
- First take a look at the model, look at the shapekeys, the parts, the materials. Fix up the materials by adding textures if neccessary, and whatever.
- Delete mesh from the outfit that you do not need. Go into edit mode, and select mesh. See [Link to blender hotkeys] for mesh manipulation hotkeys, but I find ctrl-l to be the most handy. Using CATS to seperate the outfit by materials is also very useful for removing parts.
- Delete mesh from mesh objects or delete entire objects.
- Use ctrl-l to select all linked, circle (c) and box (b) select. Going into wireframe mode can help seeing the verts.
- Cats seperate by part/material can help cut the model into pieces for deletion.
- Delete unneeded bones in edit mode. Wiggle/move them in pose mode to check they don't affect anything any more. Select them in edit mode and delete them. shift-g when a bone is selected can help you select all children; and circle select (c) is handy for selecting multiple bones.
- Apply transforms. Blender sneakily also stores a position of mesh as an offset, and when merging two together, the offsets are reset. In object mode; ctrl-A and apply location,rotation and scale.
- Save this cleaned outfit as a .blend file.:
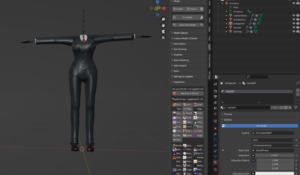
Summary:
- Take a look at the outfit.
- Delete stuff you don't want.
- Apply transforms.
- Save this as a .blend file
Preparing and Bringing together
Next step is to prepare your base model for the outfit. I recommend making a sub folder, and making a copy of your blend file there and working from that. Once you are done with the outfit it's easy to merge it back up and make it part of a set - although this is not recommended as it bloats avatars.
- Clean up the 'branch' of your base model the same way you did your clothing. Remove mesh and bones you don't need (I often leave underwear on while I'm working on it though). For full outfits, at least. For just a small addition, just remove what you are replacing, or maybe remove nothing at all. It makes it much easier to work on if all you have is the outfit and the base.
- Save the blend file in a subfolder. It helps having outfit related stuff sectioned off; especially since this is often a long process and I highly recommend making many iterative saves. Press ctrl-shift-s, hit the +, then save.
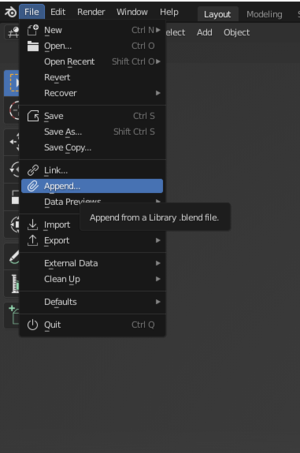
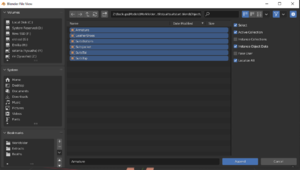
- To bring in the outfit, go to File --> Append, select your blend file, then go into objects, and select all the meshes and bring them in. This will give you two armatures. Leave them separate for now.
Summary:
- Clean up base model
- Save in subfolder
- Append clothing blend file onto base
Getting the Clothing Roughly in Shape
Skill: Pose mode modifications
Now that the blend file contains both the clothing and your base at the same time, the first step is to use pose mode to get them roughly aligned.
- Take a look at how different they are. Use the view controls like middle mouse button drag, zooming, and such to get a general feel of how close you are.
- Enter pose mode and select the hips. Move the clothing with transform - g - and lock the axis with y, x or z. Move it so the hips are roughly in the right location.
- Then use scaling. In pose mode, hit s, then z y or x to lock the axis. Concentrate first on getting the scale of the torso approximately right. Use the hip bone to get the butt roughly in the right place and size, then chest and then shoulders. When you change the scale of a bone it will change the scale of all the children of that bone by default. If you need to scale something other than the hips (EG the torso is too long) do parent bones first.
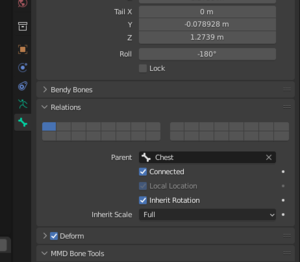
- To lock the scale of child bones, go into edit mode, select the bone and click the green bone icon in the properties pane. Change inherit scale to none for bones you don't want to be scaled. For example if you want to make the legs shorter without squishing the feet, disable scale inheritance, and then scale the bones. When doing legs and arms and such, look for the symmetry options up at the top right; you will want x symmetry.
- Tweak until roughly right. Sculpting and proportional editing will make the mesh much closer in shape.
- Press 'save as rest pose' to lock it in place. Remember to make regular iterative saves! (ctrl-shift-s, hit + icon)
Example screenshots (view the captions for comment)
Getting started:
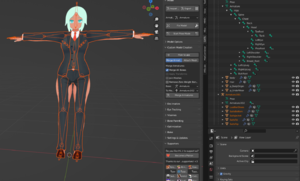
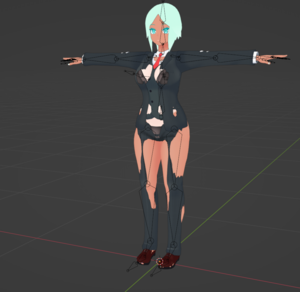
I lined up and scaled the outfit. First I moved it back, then I scaled it up or down a little so that the arms matched up a little more.
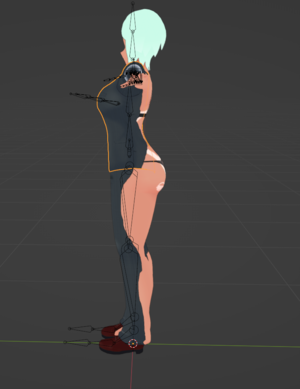
I somehow chose an outfit that was pretty damn close to my base model so not much here was needed. The shoulders match up and the hips are roughly in the right position. You can see that the pants are completely not thick enough but that gets sorted later. Note that if you're posing and stuff looks wrong, don't leave it like that.
To change the shoes higher I will then move the legs up. However I don't want the shoes squished:
Then I moved the legs; select both legs with ctrl-click then s - z then moved. I also wanted to rotate the shoes, but I used symmetry. Hit the x symmetry next to the butterfly at the top right and whe you rotate a bone it does the mirror action. Symmetry is pretty important overall. As a rule; keep your base body symmetrical. Outfits rarely are.
And I just kept going, making small adjustments, then applying as rest pose until the overall shape and size was close:
Summary:
- Before merging armatures, use pose mode to squish and move the outfit to roughly match your model
- Scale (s) and move (g) and rotate (r) all allow locking axis with x y or z.
- Aim for shoulders and hips first
- Apply as rest pose when done
Merging Armatures
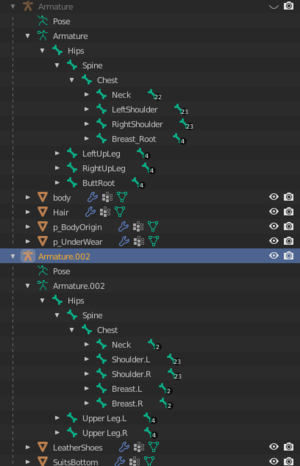
At the moment you should have two seperate armatures and skeletons. Merging them allows one bone set to move both the outfit and your base body. The goal here is to first make the armatures match in terms of structure and bone names, and then move the meshes to the base body armature, and then set the armature of the mesh to the new one. CATS automates the moving and setting so I will be using that.
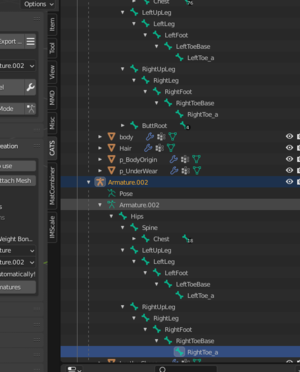
- Rename every bone in the outfit armature to match the names of the base body armature. For example if the base body calls it ArmLeft and the outfit calls it ForeArmL, then that bone needs to be renamed. This is tedious but it saves pain later. Double click a bone in the top right to rename it.
- For bones that don't exist; create them. (shift-e extrudes an existing bone in edit mode) Usually this will be 'root bones'- weightless bones that just act as a parent for use in Unity later with physbones. Make the weightless bone, then parent all the ones that should be to it (such as hair roots), in the green bone properties.
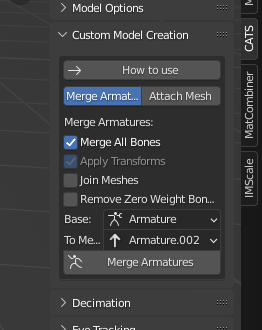
- CATS merge armatures can be used after the names match; make sure to UNTICK join meshes and UNTICK remove zero weight bones. I recommend having merge all bones and apply transforms ticked.
- Should now have one armature with mesh all tied to it. Give pose mode a wiggle to check. If something doesn't move chances are you forgot to rename it. Note that you can no longer do pose mode adjustments as detailed above.
Example screenshots (view the captions for comment)
Basically just rename the outfit's bones to match your model. Not difficult, just tedious. Save often since there's a blender bug that causes it to crash when you try and rename stuff. If you notice, there's a breast_root in the base model but not on the outfit. This will be added.
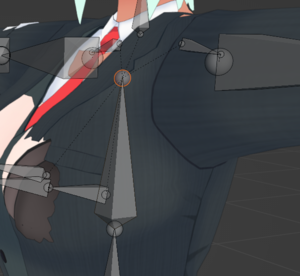
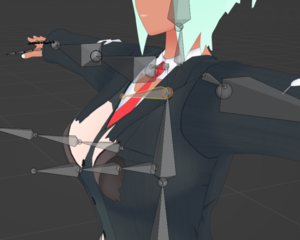
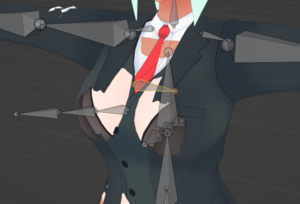
So what I did is make a new root bone (in edit mode). I selected the tiny little ball at the top of the chest bone, hit shift-e to extrude the bone, then locked it to axis y with y, then moved it out a little then clicked. I unconnected it from the chest, then rotated it by 90 and moved it somewhere roughly in the chest. As it's weightless it's just there to be visible.
Then I parented the two breast bones to breast_root in the new armature. No pictures sorry. However anyway I kept renaming everything relevant. For example I stopped at the fingers as the outfit had no gloves. No point. Remove them from the outfit (you should have already) if still there. There was also no butt_root, but there was also no butt bones on the outfit either. Those will have to be weighted more manually.
Then once everything was renamed, I merged.
Then I gave it a wiggle to see how close I was. It's okay, nothing was forgotten this time. After this you would move onto sculpting and getting the mesh to fit your body.
Summary:
- Rename outfit bones to match body bones, adding to or removing as needed.
- Merge with cats, remember not to merge meshes (yet).
Fit Fine Tuning - Sculpting, Proportional editing,
Skills: Sculpting
The goal with this is to take the loose fit and match the meshes up using sculpting tools. This is the step you will get the stationary look correct; wrapping the outfit to the body, squishing parts of a hat to match the head shape, expanding or contracting areas, and so on. The key to doing this is to split up the outfit into small components.
The general process is below:
- Split the outfit into parts. Visualise how you will split the outfit up. Generally this should be do it piece by piece from disconnected outfit parts; wriststraps, gloves, boots, hats, tops, bottoms; split it up into logically connected parts as much as possible. Make them seperate mesh objects; go into edit mode, select the vertexes that make up that 'part', and then press p and split it into a new component. It helps me to name these components.
- For each of these parts, you will very often want to use 'merge by distance'. In edit mode, select the vertexes, then hit 'm', then click 'by distance'. This helps to ensure that they are actually one piece of connected mesh. Vertexes that are in the same place but different will drift apart from each other during editing.
- Edit the mesh using sculpting, proportional editing or regular editing, (See below)
- Modify the mesh to fit over your body. The closer the fit the harder weighting will be but initially concentrate on getting it looking decent.
Sculpting
Sculpting lets you pull, drag, twist, rotate, squeeze, smooth, etc etc mesh in a clay-like fashion. Most useful when the shape you want to make is complex.
- Go into sculpt mode; There's a sculpting tab in newer blender that is worth using, but sculpt mode can also be entered by selecting the mesh object and switching the mode.
- The tools most used by myself are elastic deform and grab. Start with elastic deform and start pulling your mesh around over your avatar. Use "." on the numpad to zoom into an area, adjust the radius and use the scroll wheel to zoom in and out to affect more or less mesh at once. Pull mesh out from under your body until it is over, and push it in where it is too far out.
General Tips:
- Use x mirror (the butterfly at the top righT) to mirror sculping changes. Turn it on forwhen you're working on a symettrical part and off for when it is not.
- <Insert trcik to make it transparent here*
- Set the rendering options to use random color instead of texture if theclothing and skin are too similar to see clearly.
- Zooming in and out, using "." on the numpad to focus, and general moving around and seeing it from different angles will help getting it look okay.
- Use the radius to change the size of the sculpting brush.
- Pull stuff out to match the general shape first - broad strokes, and then fine tune.
- Most suited for larger pieces of clothing; sculpting flat, boxy objects will often make them lose their clean edges.
- Playing with the various tools is recommended since they can give better results for certain operations; EG "Pose" works quite well for moving ties, strands of hair, ribbons etc. "Smooth" is pretty good for unroughing an area, but it tends to shrink an area a bit.
- Vary the strength of tools for more fine control.
- trial and error will be your best friend, get comfortable with the ctrl-z and saving a copy to grindyour way to a mesh that looks okay.
- For solid objects like buttons it is best to seperate them out and move them around with editing so they don't get all squished and squashed by scultping. It's hard to restore a pretty shape once destroyed.
- Keep things in pieces.
- Keep an eye on the topology near joints. Most mesh has a denser region, or differing topology near joints and when squeezing and squishing you will want to keep those denser regions near the joints on your base model; most notably with gloves. (Avoid gloves if you can)
Proportional Editing
This lets you drag a vertex or group of vertexes around and then have other vertexes also move proportional to how close they are to the moved bits. Useful for squishing and squashing, draging and general fit adjustments. Such as adjusting a collar.
- To turn on proportional editing, go into edit mode then click the little circles at the top.
- Important: Zoom out and use the scroll wheel to adjust the radius for the adjustment. By default the radius is so huge that your entire mode is included and all you do is yeet your mesh around awkwardly.
- Select a vertex or group of vertexes and use transform tools; move (g), scale (s), rotate (r) and mesh around it will be dragged along. proportionally.
- For example if you select a line of vertexes down your collar, you can squish the collar back and forward by using g, then hitting x or y to lock the axis, then moving the mouse around.
General tips
- X mirror helps here too. Turn this on when editing symmetrical mesh.
- Sculpting grants more diversity in mesh movements; this is basically limited to squish around.
Editing
Alternaively moving around vertexes piece by piece is a viable way to do fine tuning and moving solid objects like armor plates or buttons.
- Enter edit mode (and make sure proportional editing is off)
- Select the vertexes you want to modify. This could be a ring, a collar, a shoulder armor piece, a belt buckle, etc. Solid items for wholesale movement or a small number of vertexes for fine tuning of the toplogy work best.
- Move/Scale/Rotate them around until it looks better. Rotate around the model and check from multiple angles.
Selection and movement hotkeys:
- Selection: Box (b), circle (c). Use middle mouse button in circle select mode to unselect vertexes.
- Can also shift/ctrl click individual vertexes to select them.
- Ctrl-L will select all linked vertexes. If you have any unlinked vertexes you will find out with this. (Use merge by distance to merge overlapping vertexes)
- Alt-Click can select a loop but with clothing and weird toplogy this might not be the most useful.
- Set the view to wireframe when selecting verts to make sure you got them all
Weight Painting
Weights are what bind the armature and the mesh together. When the bones are moved (in pose mode or in game) the mesh moves with it, and how much this moves is dependent on weighting, which is a heat map that is applied to the mesh a bit like a texture. Understanding that a bone is weighted to the mesh, so that when the bone rotates, trasforms, or scales, the mesh changes the same way but according to the weighting specified will help you with weighting.
You should already know that bones are assigned to the mesh via vertex groups. These are the sections of mesh that are registered to that bone; and they're registered by having the same name (case sensitive). <Unsure>: If you try and add weights to a mesh from a bone to a mesh not in that vertex group, blender will expand the group automatically to cover the new weight. Overall you don't need to worry about the details of a vertex group much since it is more important that it has one to apply weighting to.
Weight painting is usually a very long tedious process but if you take a methodical approach you will at least usually make a weighting better rather than worse. Experience will make you faster at recognising what to do.
The process can be split up as follows:
- Take a look at what you have already
- Data Transfer (Weight Transfer) - Get a cheating head start
- Weight big chunks/ entire vertex groups (easy wins)
- Actual Paint weighting
- Fine tuning
I'll include some additional info such as some tidbits on from scratch weighting and maybe some extra stuff that's useful.
Entering Weight Paint Mode
It's not intuitive to enter weight paint mode so I recommend learning a setup for it. Mine is as follows:
- Ensure edit-> lock object modes is off
- Go into pose mode then select a bone
- Then select a mesh and enter weight paint mode
If done properly you should see the highlighted bone and the weights on the mesh.
- Ctrl-click other bones to switch between a bone.
- Press r to rotate a bone and see live what weighting is doing to the mesh
- alt-r resets a rotation
- m enters mask mode where you can individually select faces to avoid weighting the wrong mesh
See what you have already
This step is simple. You wiggle the model's bones around in pose mode and see how good the weighting is already. At this point the mesh should look at least statically correct.
- Select the armature and go into pose mode (click armature or pose in the top right, then change the mode to pose)
- Wiggle the bones around (alt-r resets the rotation of the bone)
- Look for issues:
- Stuff that doesn't move but should
- Stuff that does move but shouldn't
- Stuff that moves too much
- Stuff that doesn't move enough
Those are also the general categories of issues: depending on the scale of how bad the weighting is changes your approach.
Tips:
- If you're inexperienced you can use this to take a look and see how moving the bone around pulls the mesh around and how it compares to how it is weighted.
- Transforming the bones with g and moving them away from the model is useful to see very subtle weighting that shouldn't be there.
- If the mesh doesn't move at all and looks like it is weighted; check that the mesh has the armature set. Select the mesh, go to 'modifier properties' (blue wrench) and check the armature modifier. Add if it neccessary, and ensure the object is set to the right armature.
<todo: Some examples>
Big Changes
For objects like armor pieces, hats, rings, and to a lesser extend shoes - objects that don't bend but just need to be attached to something - you can weight the entire mesh to a bone. When you do this, when the bone that the object is attached to moves, the entire object moves as if glued to the bone.
Via Vertex Groups
- Enter Edit mode
- Select the mesh of the object. Seperate it out into its own mesh (if it isn't already).
- In Object Data Properties (Upsidedown green triangle) find "Vertex Groups"
- Find the vertex group of the bone you want (or create it). Use select and deselect to identify vertexes in that group (if any)
- In edit mode, the "assign" and "remove" buttons for the vertex groups mean assign/remove vertexes to that group with the weight specified. If you click assign on a vertex group it will assign all those vertexes to be weighted to the bone and remove will do the opposite. If you switch between edit and weight paint mode you can see the colour change from blue to red, with red being fully weighted and blue not. Rotate the bone in pose mode between the two to get a sense of what you did.
This is the more complete method and represents a more direct way to manipulate vertex groups.
Via Weight Painting
- First check that the mesh is seperated out, and that there is a bone ready for the mesh to be weighted to. For example for a hat, you would want to weight it completely to the head (unless there are wiggly bits on the hat). Or for a ring, completely to the finger, or a armor piece completely to the limb or chest.
- Enter weight paint mode with the bone you want to weight the mesh to. (See above)
- You should see the selected bone and the mesh; if it is purple this means there is a null weight assigned (blue is zero, red is 100%) - If you check it has a vertex group or try painting it <unverified lmao> it will probably start getting data and turn blue/red.
- Go to "tools" on the right panel (n hides and unhides it) and select add
- Set the strength to 1.0 and paint on your object. Note that when you paint you are changing the weight value of vertexes, the value each one has is reperesented by a heat map that covers the faces, but remember you are painting the vertexes.
- Rotate the view around, and make sure all the mesh is painted solid red.
- Rotate the object as you're working with r, and reset the rotation with alt-r.
- You'll be done when it's all painted.
This is more of a brute force method that works to intro yourself to weight painting with a very easy example and use of the tools.
Data Transfer
This is a method of skipping some weighting by using the weighting of something else, in this case the base body, and pasting it onto the weighting of the outfit. This works by projecting the weights outwards, and is a destructive process to the weights that were there already.
Terminology wise; there will be two meshes that share an armature, with a source mesh and a destination mesh. The destination should have vertex groups already created.
- Seperate out all mesh you don't want the weight replaced on; like solid pieces like hats, or parts that are actually weighted pretty well already.
- Give the stuff you're working on a wiggle in pose mode to see what the weighting is like before the operation. And look at it in weight paint mode.
- Select the destination mesh and select modifier properties (blue wrench)
- Add modifier --> Data Transfer
- Select the Source object as the mesh you want to pull weight data from (base body usually)
- Tick 'Vertex Data', open the submenu and select 'vertex groups'. This will slap vertex group data from source vertex group to destination vertex group. "Generate Data Layers" is supposed to do something but when I was testing it, it wasn't making vertex groups or doing anything.
- If you enter weight paint mode you might be able to see the weights appear on the mesh, but don't count on it.
- Make sure you're in object mode, and press the little down arrow (v shape) next to the x, and press apply. This should apply the weighting.
- Enter pose mode and give the model a wiggle again; if it changed then it worked. Sometimes it doesn't work for me and I think it's because I hit apply in the wrong mode or have the wrong thing selected, or something. Try again a few times if it didn't work.
- Data transfer weights usually come out kinda blocky; so that's a way to tell it worked.
- Check the weighting. If it got better, great. If it got worse, revert. Either way it's likely not going to be perfect.
- Enter weight paint mode, and use the blur tool over each bone's weighting. OR try the Weights > Smooth option, and fiddle with the parameters.
- Wiggle again.
Tips:
- Like all weight painting, regularly wiggling bones around is going to be important to checking weighting. Check the weight fine tuning section for a more methodological approach.
- data transfer transfers weights by projection; it is very likely that lots of mesh will be painted when it shouldn't be at all; like collar bits, ribbons, cuffs, etc.
- It also might fail to weight a few things usually if you forgot a vertex group. Gross weighting can be used to decent effect.
Robust Weight Transfer
A third party addon (Free) was released that looks like it transfers weights far more effectively.
https://github.com/sentfromspacevr/robust-weight-transfer
After actually trying this I can say you should definitely use it. It's free and works way better than standard weight transfer.
- Download the correct version from 'releases' for the version of blender you use (important).
- Edit -> Preferences -> Addons, then find and install and activate it.
- It should appear on the tools tab, don't look in modifiers.
- It works the same as data transfer; the selected object should take weights from the object you choose; with some vertex group filters if you want to do that. There's smoothening options and I always just ticked it and it was fine.
- Some minor weight painting will often be needed after this tool as always, but this saved me hours of weight painting when I used it; skipping right to minor touchups.
Gross Weighting
This is between the big changes and the fine tuning, this is general painting of weights. Useful for fixing bits of mesh that are weighted that shouldn't be (such as from data transfer), for weighting entire patches and areas. Life for example you have a ribbon that you want to add bones to so it can wiggle, or your outfit doesn't have a butt wiggle area but your body does.
When weighting, you should also consider bone position. The bone's location should be at the core of where the moving mesh should be; any weighted mesh to that bone will be stapled in its relative position to the bone. For example, if you weighted a finger to a leg bone, when the leg bone moves, the finger would rorate around the axis that the bone moves; causing the finger to fly off. Like the bone was actually a sphere and you were katamari'ing pieces to it. Rotate a joint of meat in your mind, the cops can't stop you. Also consider that child bones of a parent bone will rotate as if they were completely weighted to the parent; for example when you rotate the lower leg, the foot goes with it, then when you rotate the foot, only everything under the toe bone moves.
Some bones are meant to have no weights. These are usally either to act as a root bone; a joined parent so that in unity physbone scripts can act on the entire wreath of chains with one component, or as a leaf bone; a ghost bone that is there for physbone or dynamic bones so they wiggle at the end.
- Seperate out the mesh you want to weight
- Enter weight paint mode for the bone you are working on (see above)
- Rotate around the bone to get a sense of its place in 3D space. Consider what you want to move when the bone rotates and what you don't want to move. You can take a look at other weighted things on your base body to get a sense for what it should probably look like; in general for something like a limb or a ribbon you want the bone inside the part and when a ring of red around th
e core of the bone, with it getting gradually less hot as it gets away from where the bone is.
- Enable options -> auto normalize (In the 'n' menu Tool section on the right) - This adjusts other vertex groups appropriately: If you paint a bone to have some weight that overlaps with another bone's, it'll subtract that bone's weight. Useful to not having weird weights.
- In weight paint mode, select the brush, and use the add or subtract tools to paint on an appropriate weighting. Adjust the strength where neccessary.
- Give the bone a wiggle with r and paint some more.
- Repeat this process until it looks fairly close; if it's overlapping or something just a little you can do fine tuning which will be covered later.
- Use the blur tool to smooth out messy looking weighting.
General tips:
- I have not figured out weighting symmetry yet. My best solution is to weight one half, then duplicate it, mirror it, and then rename the vertex groups of the copy to the 'left' versions so that the weights apply mirrored like.
- The guidance here is pretty vague because accuracy doesn't need to be high. This is most useful for very rough weighting, or weighting something that won't be clipping.
- For a breast or butt bone, the weighting will be a circular patch around the tip of the bone in most cases. Check the body base.
- Move the object around with g (transform) to chekc you haven't added weighting somewhere you shouldn't have.
- There is a gradient tool you could make use of but I've only really found it useful for end pieces. If there is a 'inverse gradient' or 'deletion gradient' option I can't find it.
- Don't try and get it perfect, you can fine tune weighting easier with another technique.
- Autoriggers exist to help map weights to a bone; and there is some autoweighting built into blender. If you have any experience with this please add an entire section.
Example:
Dragging bones allows you to easily find weighting that should not be. In the below example I dragged the right leg out into the distance, and one vertex on the left leg popped out as it had a very slight weight that may not have been noticed elsewise. In this position I'd use the paint tool on subtract to blap the vertex popping out back to zero.
Weight Fine Tuning
Using masking it is possible to seperate weighting out and tune it vertex by vertex in a methodological way. This is what I spend most of my weighting time doing, and while tedious, gets weighting to a point where you can make progress instead of making things worse constantly. This is mainly in this context to fix clipping issues.
Most of the progress you will make will be balancing vertexes between the two concepts: Is this vertex moving too much or is this vertex not moving enough. If it is moving too much, hit that vertex with a little subtract of weighting, and if it's moving no t enough, up the weighting a bit.
Also keep in mind again that you are changing the weight values on the vertexes, not edges or faces. Often times, mismatching topology will result in mesh coming in from underneath through an edge or face, and the solution for you is to adjust the weights of the vertexes until they pull the face or edge out of the intersection.
- Enter weight paint mode on the bone you want to weight.
- Wiggle the bone around with r. It should be roughly correct, with some minor intersections and problems. If it's completely of
f, go back to a more gross scale of painting.
- Break down the weight problems into the three axis; Hit r --> x for example to lock the rotation axis to x. Do the same with y and z and give them a look.
- Choose an axis to start (I recommend one of the axis that don't cause the mesh to twist up like wringing a cloth)
- First reset the rotation with alt-r. It should look fine since you're weighting now. If there's any overlap on a neutral rotat
ion you need to edit the mesh.
- Enter mask mode with m. There's a button in the top left of weight paint mode that does the same thing. You should see that the faces have become white. Click on a face to select it, causing it to gain color, and each of the vertexes can now be affected by the weight paint tools.
- Rotate the bone you are working on locked to one axis until you see clipping. Scale the rotation back until it's barely clipping.
- Select one of the clipping faces
- Using either add or subtract set to a strength of 0.05 to 0.1, adjust the weight of the vertexes. Rotate the bone very slightly over your chosen axis and watch the vertexes. If they move too much and cause clipping, clikc them with the subtract tool on a very weak setting until clipping stops. If they don't move enough, add more weight to the vertexes surrounding the face.
- Repeat this for all clipping, and then bend the bone a bit more and repeat the process.
- Keep going until you have eliminated clipping up until where the bone's natural motion ends. If you're not going to bend the bone that far in game naturally then don't bother fixing clipping as realistically you are not going to bend your knee forwards in game.
- Give the weights a touch with the blur tool when you're "done" and give it another round. USUALLY this doesn't do much damage. But this is optional as if it looks fine when it bends who cares.
General tips:
- Sometimes the technique fails. In these cases, switch to sculpt mode and pull the mesh away from the base body a bit more until it stops clipping. Try not to pull it out too much but in my experience this works well as a small cheat.
- Extreme topology mismatches will be very hard if not impossible to fix. For example, if the base has 5 polygons bending it will bend in a smooth curve, but if the outfit only has one polygon covering that area, the weighting will just cause the vertexes to pull the face down through the curved area in a straight line. The only way around this is to subdivide the affected area a bit. I've not got a good way to do this though so try to avoid needing to do this if you can.
- This is a very tedious process but you will make progress, and you'll get faster and better with experience.
- The difficulty varies greatly with the topology of the outfit. Putting on gamerip outfits and MMD outfits will usually be tricky as the toplogy will be different and it will simply bend differently even when finely adjusting the weighting.
Example:
I've got video of me doing this
<todo>
Weight Via Movement
Another technique to get a 'reasonably close' weight is to move the bone (in pose + weight painting mode) with 'g' and then along an axis x, y or z. If you slide the bone around you can see where the clothing is moving more than the skin, and where it is moving less.
Where it is moving too much, you hit it with a little bit of 'subtract' at a very weak power, like 0.05, until it is moving just the right amount. Or if it is not moving enough, you hit it with 'add' at weak power. You can use blur and average tools here to blur out the inevitably janky work you're doing.
You can move the bone as far as you like, but you only need to weight to a bit of movement, not the extreme. This technique is good for getting the weighting reasonably close to where it should be in a reasonably short amount of time. I typically do this right after weight transfer or when I'm just trying to weight from scratch.
