Unity: Difference between revisions
No edit summary |
No edit summary |
||
| (5 intermediate revisions by the same user not shown) | |||
| Line 68: | Line 68: | ||
Very little configuration is needed, but I would recommend moving the panes and views around to your liking; there are loads of little windows and tabs everywhere and being able to manipulate them is where a lot of your time in unity will be. | Very little configuration is needed, but I would recommend moving the panes and views around to your liking; there are loads of little windows and tabs everywhere and being able to manipulate them is where a lot of your time in unity will be. | ||
= Useful Addons = | = Useful Addons = | ||
==Optimization== | |||
===Build Size Viewer=== | |||
https://github.com/MunifiSense/VRChat-Build-Size-Viewer | https://github.com/MunifiSense/VRChat-Build-Size-Viewer | ||
| Line 79: | Line 80: | ||
Build viewer. It breaks down the components of your built avatar (The thing you upload) and shows you what is contributing to <i>download size</i> | Build viewer. It breaks down the components of your built avatar (The thing you upload) and shows you what is contributing to <i>download size</i> | ||
===Thry VRC Avatar Tools=== | |||
https://github.com/Thryrallo/VRCAvatarTools | https://github.com/Thryrallo/VRCAvatarTools | ||
| Line 85: | Line 86: | ||
Shows VRAM usage and some other performance stats ignored by VRC but actually important. Useful for seeing how much VRAM your avatar is wasting and also highlights things used by your avatar that you might not be aware of that are eating VRAM. For example a single 4K normalmap can eat 22MB. Obscene. | Shows VRAM usage and some other performance stats ignored by VRC but actually important. Useful for seeing how much VRAM your avatar is wasting and also highlights things used by your avatar that you might not be aware of that are eating VRAM. For example a single 4K normalmap can eat 22MB. Obscene. | ||
==Testing== | |||
===Hai's Light Box=== | |||
Another great Hai tool; puts your avatar in a selection of different lighting conditions. Main problem is non of the conditions are currently BAD lighting; it's all good lighting. Either way: | |||
https://github.com/hai-vr/lightbox-viewer | |||
= | ==Creation== | ||
===Pumkins but for CVR=== | |||
https://mega.nz/file/0R1nDYxZ#dN6oU7OpIVnzYY3MXWSn8mBFKa2i_-PijweXStIe780 | |||
= Tidbits = | |||
== Getting avatar sounds to work == | |||
"There are a few things to do. First you want to normalise your audio to -6 dB in an audio editing software to avoid the chance of vrchats safety turning it into the most quiet object in the universe. Then set audio to 3d, add the vrc spacial component and set the near and far. You want near to be atleast 1 or 2 meters, outside of that the volume will decrease." | |||
== Head Chop / Allow head attached items to remain visible == | |||
By default, VRC shrinks the head bone (And all children of the headbone) to 0 when rendering you first person. You are actually looking out of a camera attached to the head and if your head was not shrank, you would see the inside of your own head. Spooky. | |||
Anyway there are some cases in which you want to see things attached to your head, such as hair, hats, or even have colliders or triggers attached to your head that you would rather not have shrank into your neck. You used to have to use some godawful constraint system where the object you didn't want shrank was actually attached to the main armature and then it was just parent constrainted to your head... But now you can just tag it according to the following: | |||
https://creators.vrchat.com/avatars/whitelisted-avatar-components/vrc_headchop/ | |||
== Constraints == | == Constraints == | ||
Latest revision as of 15:45, 15 August 2024
Unity is the engine that VRC runs on, so uploading assets to VRC requires use of the Unity Editor. You edit and put together assets such as worlds and avatars and upload them.
[TODO]: This entire article:
- Installation
- Configuration
- Useful packages/addons/etc
- Tidbits of how to do certain things; IE physbones tips, Constraints, etc.
(Since it's easier to split articles up than to merge them I'm going to throw almost everything into this main article. )
Installation
VRC's own guide is pretty good: VRC guide
- Download and install Unity Hub
- In unity hub, download the Unity version currently supported by VRChat, (Unity 2019.4.31f1 [https://docs.vrchat.com/docs/current-unity-version at time of writing.) You'll want just the defaults - 3D, Windows/PC for PC avatars, and Android for quest avatars. Install both if you think you might want to do both.
- Create a project. Name it something useful, and put it somewhere that can hold a bunch of files (Projects can go above 20GB if they're old).
- Then open this project through unity hub. Once it loads you're ready to start importing and configuring stuff
.
- To make VRC avatars you'll also need to install the VRC SDK. You can get that after logging in on vrchat.com.
Tips:
- Back up your project regularly. It is entirely possible to fuck up a project beyond repair. To do this just copy the project somewhere else; using 7z to compress it is advised.
Unity Concepts
Unity is mostly managed with a file structure. you load in textures, fbx and model files, normalmaps and othet images, and you can create animations, controllers, and a number of meta files and properties controlling the space. Importing is usually done by either dragging and dropping assets into the unity windows project browser, opening and extracting unitypackage files into the system, or simply putting files in the project in Windows. The order of import often matters, as if imports are made on top of eaxh other they will overwrite the old file. This is generally the main reason to keep backups: you can break your project with an import and it is very hard to fix. Another thing to keep in mind with imports is that they can clutter a project with crap. This is most likely going to cone from various booth models, shaders, and other fun things tou import to put on models or play with. Some will break as other stuff is ipdated and cause problems. Hence backups.
Layout.
by default the layout comes with the following: scene to the left, main game/view pane in the middle, and animations, project files, and such.
Scenes
Scenes are collections of configured assets that actually form a rendered game world. You will be configuring your avatar to work in an empty game world, and thrn bundle it up for use in vrchat. I rexommend working with one scene per type of avatar: eg a scene for all of tour models derived from base x, to avoid them getting too large, mostly for concenience reasons. Remember to save the scene you are working on regularly, and if you find where you saved the scene in the project files, you can drag it into the scene pane to have multiple scenes active at once. Game Object
Anything dragged into a scene becomes a game object. Game objects can have parent s and children and can even be blank. Their properties can be seen in the inspector pane.
Animations
These manipulate game objects, and this includes bones of models, but also properties of any game object such as if it is active, or what a material is, or whatnot.
Animation controllers
These contain game logic that is generally used to control animations, as per thr name. these are most often used to control gestures; ie when you make a 'gesture' the game will see a gesture state activated, and this state will cause a condition to react to it, playing an animation on the avatar, like an animation that controls shapekeys yo make a simley face. That is a long chain of cause and effect but the idea that it was managed by the avatar controller is the key there.
Materials
Same as in blender, these contain rendering settings for the mesh which is set by the shader, and the shader uses stuff such as textures, maps, masks, and various settings to decide how to draw the mesh on screen.
Rigging
A property of an imported model, this determines the structure of the skeleton. unity expects bones ordered in a specific way, the hips being the central bone, and everything else branching out from it. This should have all been done in blender; unless you want to not have a humanoid model, which for a vr game is up to you.
Play/modes
Play mode is a full render and run of game logic. Important: Any changes you make in play mode are not saved when you exit play mode! Youll often be in play mode to test things, but nothing you tweak or modify in the scene will be retained. This can be used to your advantage too.
Configuration
Very little configuration is needed, but I would recommend moving the panes and views around to your liking; there are loads of little windows and tabs everywhere and being able to manipulate them is where a lot of your time in unity will be.
Useful Addons
Optimization
Build Size Viewer
https://github.com/MunifiSense/VRChat-Build-Size-Viewer
Build viewer. It breaks down the components of your built avatar (The thing you upload) and shows you what is contributing to download size
Thry VRC Avatar Tools
https://github.com/Thryrallo/VRCAvatarTools
Shows VRAM usage and some other performance stats ignored by VRC but actually important. Useful for seeing how much VRAM your avatar is wasting and also highlights things used by your avatar that you might not be aware of that are eating VRAM. For example a single 4K normalmap can eat 22MB. Obscene.
Testing
Hai's Light Box
Another great Hai tool; puts your avatar in a selection of different lighting conditions. Main problem is non of the conditions are currently BAD lighting; it's all good lighting. Either way:
https://github.com/hai-vr/lightbox-viewer
Creation
Pumkins but for CVR
https://mega.nz/file/0R1nDYxZ#dN6oU7OpIVnzYY3MXWSn8mBFKa2i_-PijweXStIe780
Tidbits
Getting avatar sounds to work
"There are a few things to do. First you want to normalise your audio to -6 dB in an audio editing software to avoid the chance of vrchats safety turning it into the most quiet object in the universe. Then set audio to 3d, add the vrc spacial component and set the near and far. You want near to be atleast 1 or 2 meters, outside of that the volume will decrease."
Head Chop / Allow head attached items to remain visible
By default, VRC shrinks the head bone (And all children of the headbone) to 0 when rendering you first person. You are actually looking out of a camera attached to the head and if your head was not shrank, you would see the inside of your own head. Spooky.
Anyway there are some cases in which you want to see things attached to your head, such as hair, hats, or even have colliders or triggers attached to your head that you would rather not have shrank into your neck. You used to have to use some godawful constraint system where the object you didn't want shrank was actually attached to the main armature and then it was just parent constrainted to your head... But now you can just tag it according to the following:
https://creators.vrchat.com/avatars/whitelisted-avatar-components/vrc_headchop/
Constraints
Moving Props Around with Constraints
Let's say you have a gun in a thigh holster, and you want to 'snap' it to your hand from your thigh, and back again. could be glasses from your face, or whatever. first in blender you want to have it either a separate mesh or separately weighted on its own bone; if you can move it around by moving the bone around this'll work.
1. Create empty objects on the armature where you want the object to snap to. EG; One on the hand (hand_target) and one on the leg (holster_target) 2. Create a parent constraint on the mesh/object you want to be moving around (the gun for example), and give it two sources; the two target objects you made. Set the weights to both be zero (the number next to the source) 3. Activate and lock the constraint. 4. Set the weight of one target to 1. Then move the empty object (if necessary) so the position you want it to snap to. 5. Repeat for the other target.
If done properly (these instructions have not been tested), changing the weight of each source to 1 and the other to 0 will snap the object to that location and it will move along with the relevant bone. You could extend this to move the object around to multiple locations if you wished.
To actually get this working; make an animation that switches the source weighting and make that trigger on a condition, such as a toggle on your radial menu.
Buttstraints / Asstraints
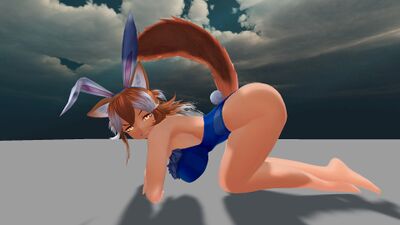
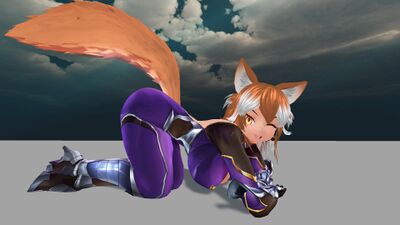
This is an advanced bit of avatar magic that increases the roundness and fullness of the butt when bent over. This is an advanced technique that is going to require significant amounts of autism and general knowhow to do.
Here are some examples of the nice full butt:
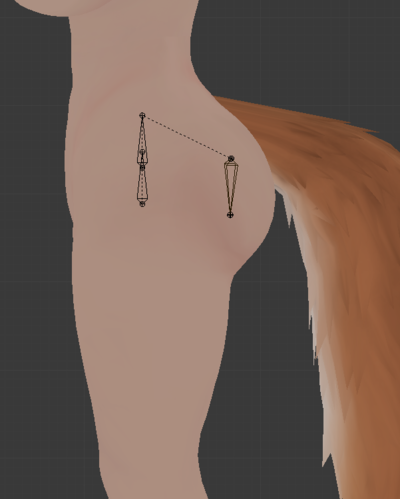
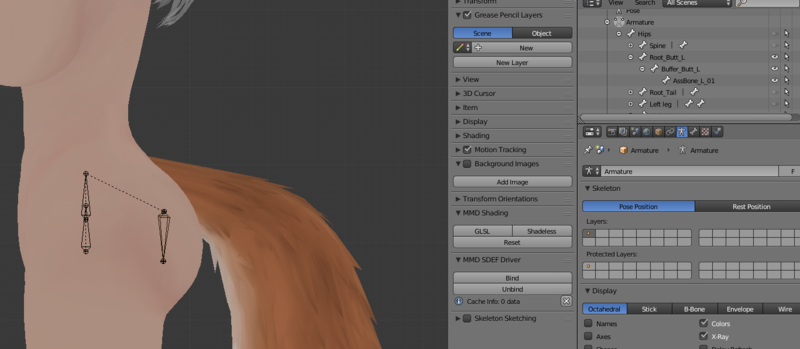
To do this you need to weight your butt to have three bones:
- One that works with the constraint directly above and is rotated to be 180 degrees away from the leg bone, so when rotation constrainted to the leg it moves in the opposite direction. So basically directly above the leg and pointing away, so when constrainted it kind of pivots around the top of the leg to overall move in the other direction (lifting the entire butt area up)
- A zero-weight bone that acts as a root for the bones weighted to the butt area that provide wiggle and such. zero weight root for physbones, more or less.
- The actual assbone that is weighted to the cheeks. Needs to be there for both the wobble and for it to stretch out as the leg rotates forwards.
The entire point is to have the butt bones stick out a little bit more when the legs bend so that the ass ain't flat, and you're using constraints to pivot the butt bones out with the legs.
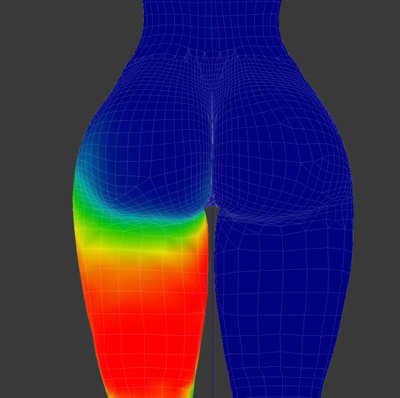
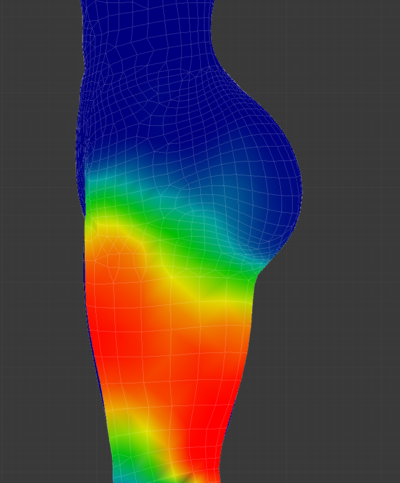
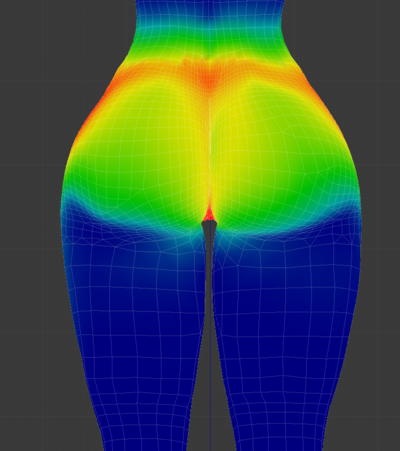
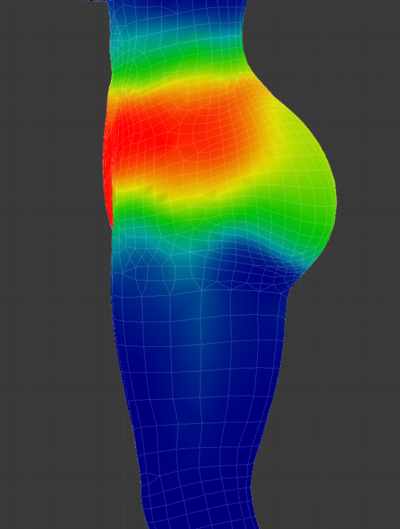
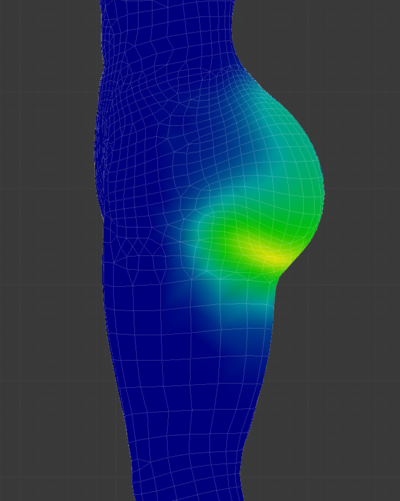
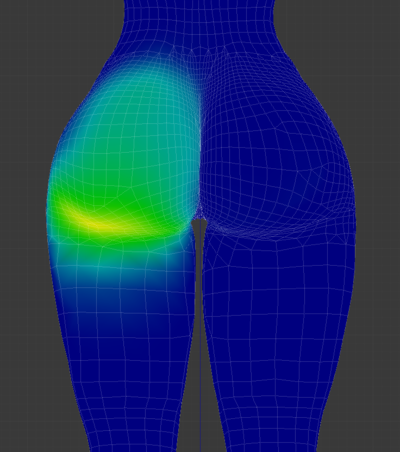
Here are some examples of the weighting:
Leg Weight:
Core Weight (Hip?):
Cheek Weight:
Here's an example of the constraint settings:
Messing with the weight of the constraint balanced with the weight painting is the key to get the right effect. Lots of tweaking expected. Generally for testing it's good to check reasonable leg angles (40-60 degrees), and then an extreme angle such as 120 degrees bent leg. If it looks good in both then you're good.
To save some unity imports; There are Blender constraints apparently, but it's possible to just pose the bones as I'd expect them to move in Unity. So rotate legs forward 60 degrees, rotate the to-be constrained bone 30 degrees back For example.
