Tracker battery replacement: Difference between revisions
No edit summary |
No edit summary |
||
| Line 11: | Line 11: | ||
1. Find the screws in the back. There are '''THREE'''. See the image: the cutouts are where the two main ones are and the third is under the flap here. | 1. Find the screws in the back. There are '''THREE'''. See the image: the cutouts are where the two main ones are and the third is under the flap here. | ||
[[File:Screw locations.jpg|500px|alt=screw_locations.jpg|screw_locations.jpg]][[File:Screw locations2.jpg|500px|frameless]] | |||
2. Pop off the top cover | |||
[[File:Top cover popoff.jpg|500px|frameless|none]] | |||
3. There is ANOTHER SCREW holding on the circuitry core, unscrew that, then peel open the arms a bit and wiggle the core out. | |||
[[File:One screw.jpg|500px|frameless|none]][[File:Peel open.jpg|500px|frameless|none]] | |||
4. There is a ribbon cable attaching the main core to the base. It's easier to ''unscrew'' the little port area attached to the base than fuck with ribbon cables. There's 4 screws, one is covered with a bit of tape, make sure to keep hold of that tape and recover when rebuilding. | |||
[[File:Ribbon cable.jpg|500px|frameless|none]] | |||
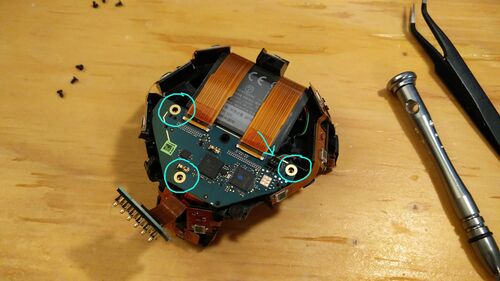
5. Flip the core over and unscrew the 3 screws holding the circuitry on, and unplug the battery. The plug goes in from the top rather than sliding in. (This is an easier alternative to unplugging the ribbon cables; I did that once and it SUCKS ASS getting them back in). | |||
[[File: | [[File:Unscrewandunplug.jpg|500px|frameless|none]] | ||
Revision as of 14:47, 28 December 2023
The batteries inside a tracker can be replaced. Bad news: It's a weird 3.85v battery, and there's no space inside the tracker to actually use a larger one so you're still basically stuck with a fresh replacement rather than upgrade.
good news: these batteries are available and aren't expensive.
Model: B2PYV100
What to look out for: chinky batteries aren't worth the $10 you save, they are often worse than the worn-out battery you're replacing. Get batteries from a reliable retailer; they should have blue/green/black cables, not red/white/black.
Tools needed: Screwdriver with a TORX T5 bit. (0.5mm bit). And a sharp knife. And some tweezers.
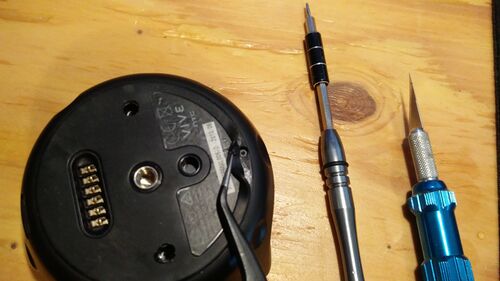
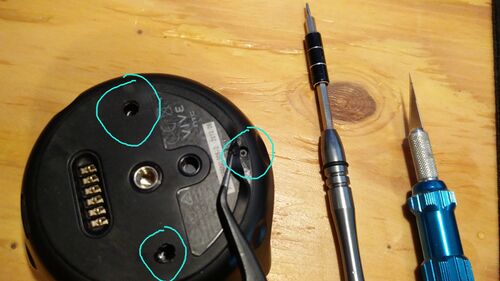
1. Find the screws in the back. There are THREE. See the image: the cutouts are where the two main ones are and the third is under the flap here.
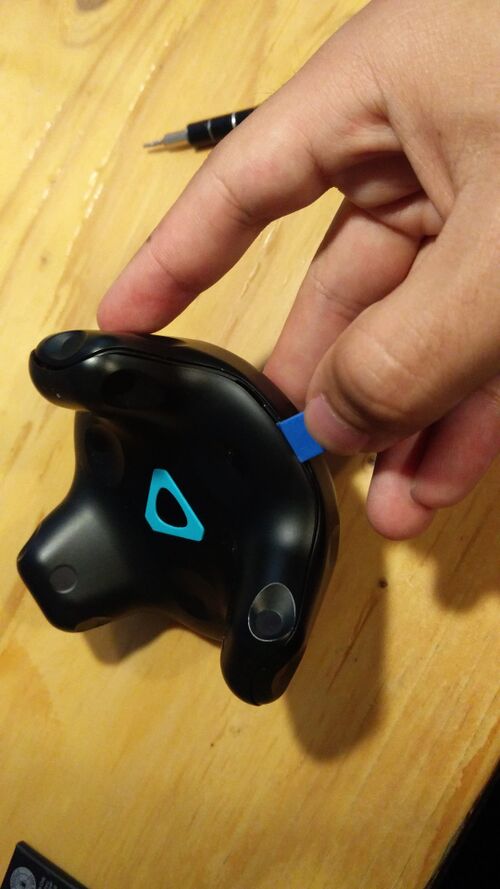
2. Pop off the top cover
3. There is ANOTHER SCREW holding on the circuitry core, unscrew that, then peel open the arms a bit and wiggle the core out.
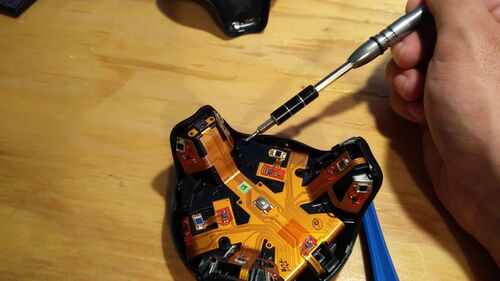
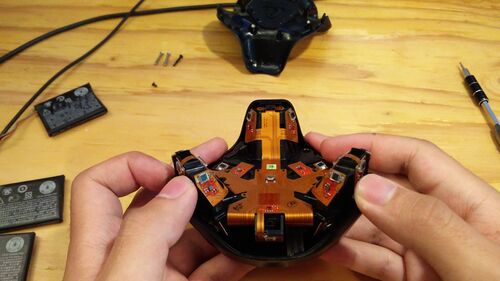
4. There is a ribbon cable attaching the main core to the base. It's easier to unscrew the little port area attached to the base than fuck with ribbon cables. There's 4 screws, one is covered with a bit of tape, make sure to keep hold of that tape and recover when rebuilding.
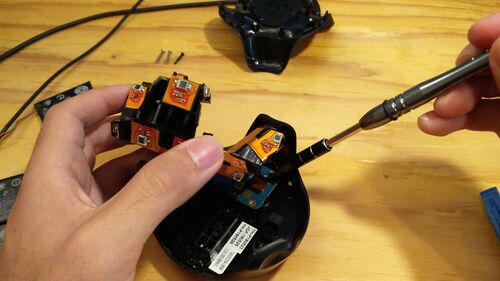
5. Flip the core over and unscrew the 3 screws holding the circuitry on, and unplug the battery. The plug goes in from the top rather than sliding in. (This is an easier alternative to unplugging the ribbon cables; I did that once and it SUCKS ASS getting them back in).
